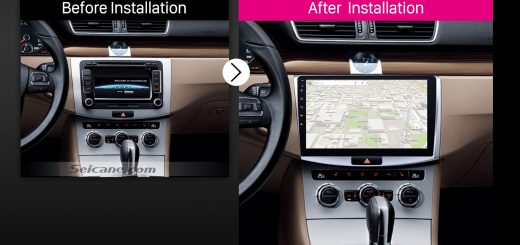
Are you still worried about your families and friends feel bored in your car on a long journey? If yes, it’s wise of you to replace your factory radio with a new aftermarket car radio which can not only bring you a lot of convenience but also offer a wide range of entertainment options for fun all the way. It’s not too hard to install a new radio. Now I’d like to introduce a detailed installation guide about a 2001-2008 TOYOTA RAV4 car radio from Seicane to you. If you also have the same dashboard as the picture below, you can follow it.
Before and during installation, you should notice:
1.Before connecting, please make sure the ignition is off to avoid short circuit.
2.Ensure connect the yellow and red power cable at last.
3.Ensure that all loose wires are isolated with electrical tape
4.Ensure don’t tangle the wire when tighten the moving parts(Such as seat rails).
5.Ensure that all ground is connected to the same place.
6.Using the improper fuse may cause damage of fire, so when replace the fuse, please consult the professional.
7.For your convenience, here’s the recommended tools for removal and installation from Seicane, please check for more details: http://www.seicane.com/car-dvd-dismantling-device-srd-400
2001-2008 TOYOTA RAV4 car radio car radio installation guide
1.Remove two trim panels at each side of the center console and set it aside.
2.Remove the top panel and set it aside.
3.Remove 4 screws holding the unit with a Phillips screwdriver.
4.Gently take out the panel on the radio interface.
5.Take out the radio and disconnect cables at back of it.
6.Check all the accessories for the new Seicane car radio.
7.Connect the harnesses to the back of the new Seicane car radio.
8.Connect the Seicane car radio to your original car radio ‘s plugs.
9.Put the new Seicane car stereo into the dash.
10.Turn on the new Seicane car stereo and have a comprehensive check if it works well.
11.Install 4 screws back to their original position.
12.Install the trim panel back to its original place.
Wish the 2001-2008 TOYOTA RAV4 car radio installation above can be helpful you. If you have any question, it’s suggested you turn to your dealer for help. If you don’t have any experience on the installation, you’d better have it installed by a professional. Besides, you need to confirm your new stereo can be suitable for your car. To check the compatibility, you are welcome to click the link below which is about a top 2001-2008 TOYOTA RAV4 car radio from Seicane.
Take advantage of the great features of this 2001-2008 TOYOTA RAV4 car radio, you can have turn-by-turn voice directions for your destinations and enjoy the bluetooth streaming music and DVD, radio, Ipod, etc.to make your trip filled with fun and excitement. Wish you can like it and have a great time on all trips from now on. Good luck to you!


Recent Comments