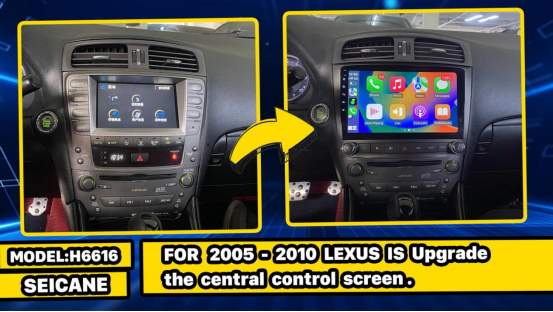
Upgrading your Lexus IS car system has never been easier. In this blog post, we’ll guide you step-by-step through the installation process. With the addition of AOS Wireless CarPlay and Android Auto, your driving experience will be enhanced with features like hands-free calling, music streaming, online map navigation, and access to a wide range of mobile applications.
Curious about the upgrade process? Follow these detailed steps:
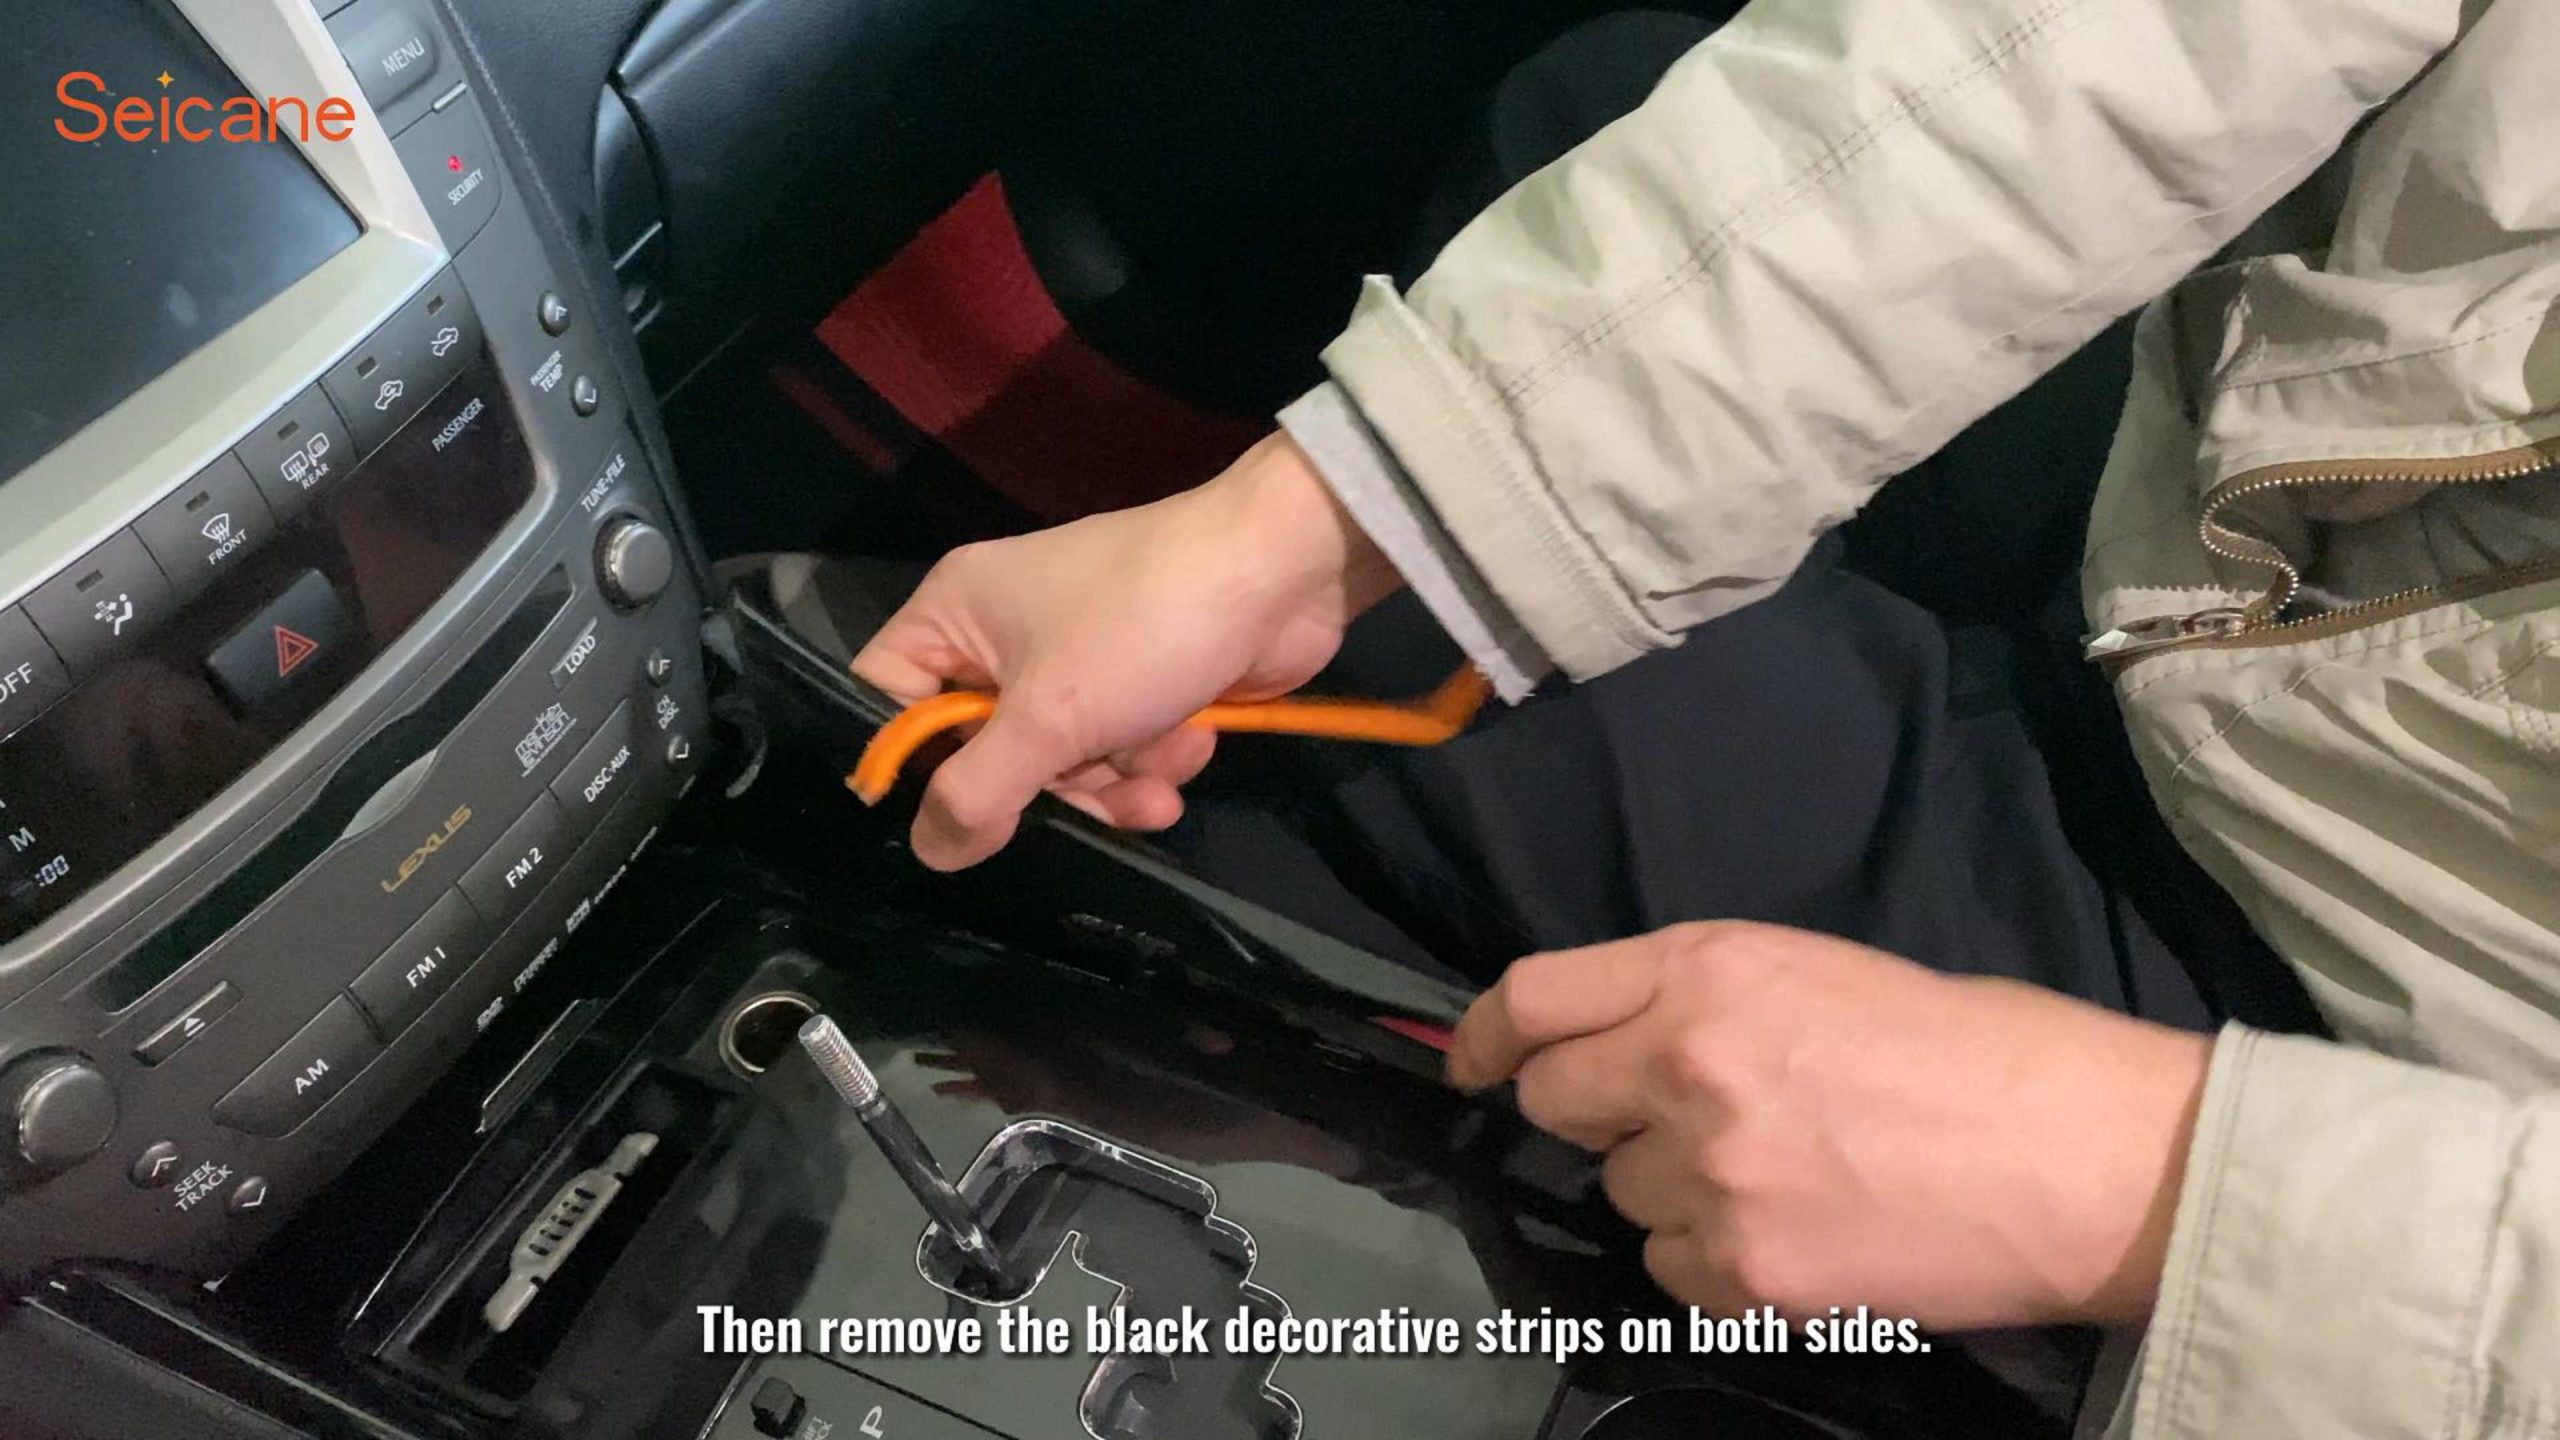
1.Rotate the Gear Grip: First, rotate the gear grip to the left and then remove the black decorative strips on both sides.
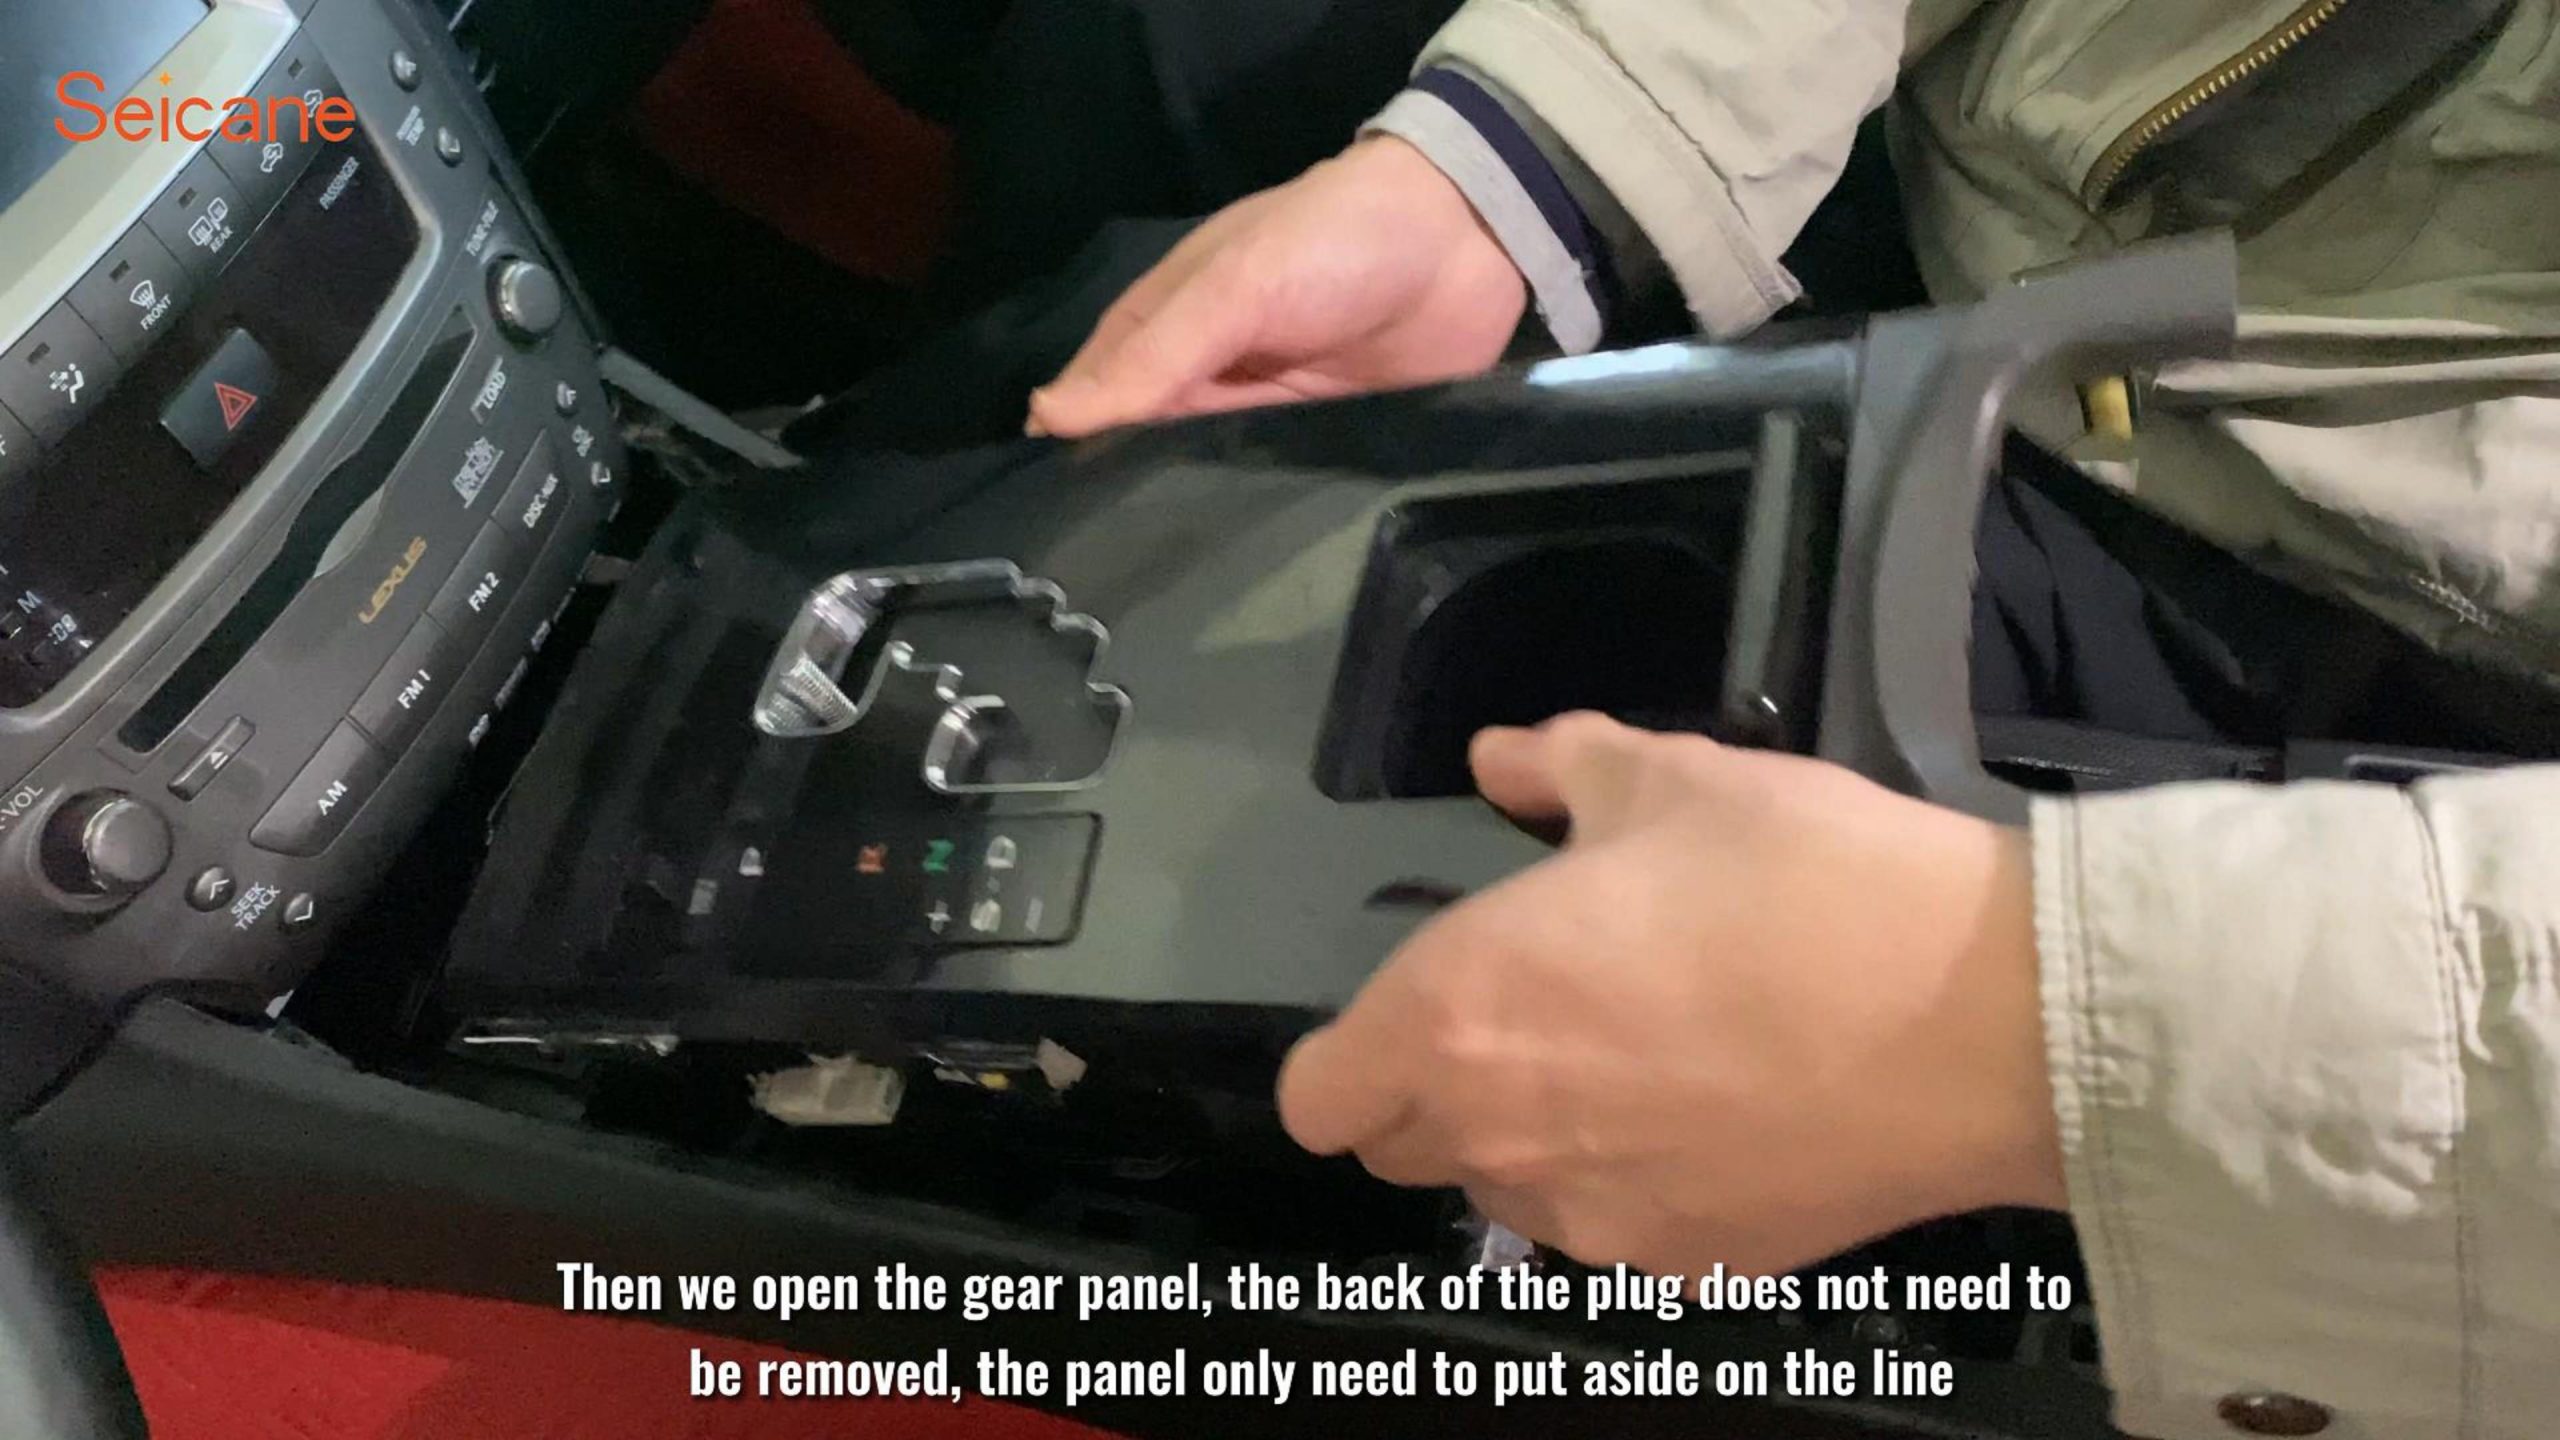
2.Open the Gear Panel: Open the gear panel. The back of the plug does not need to be removed; just set the panel aside.
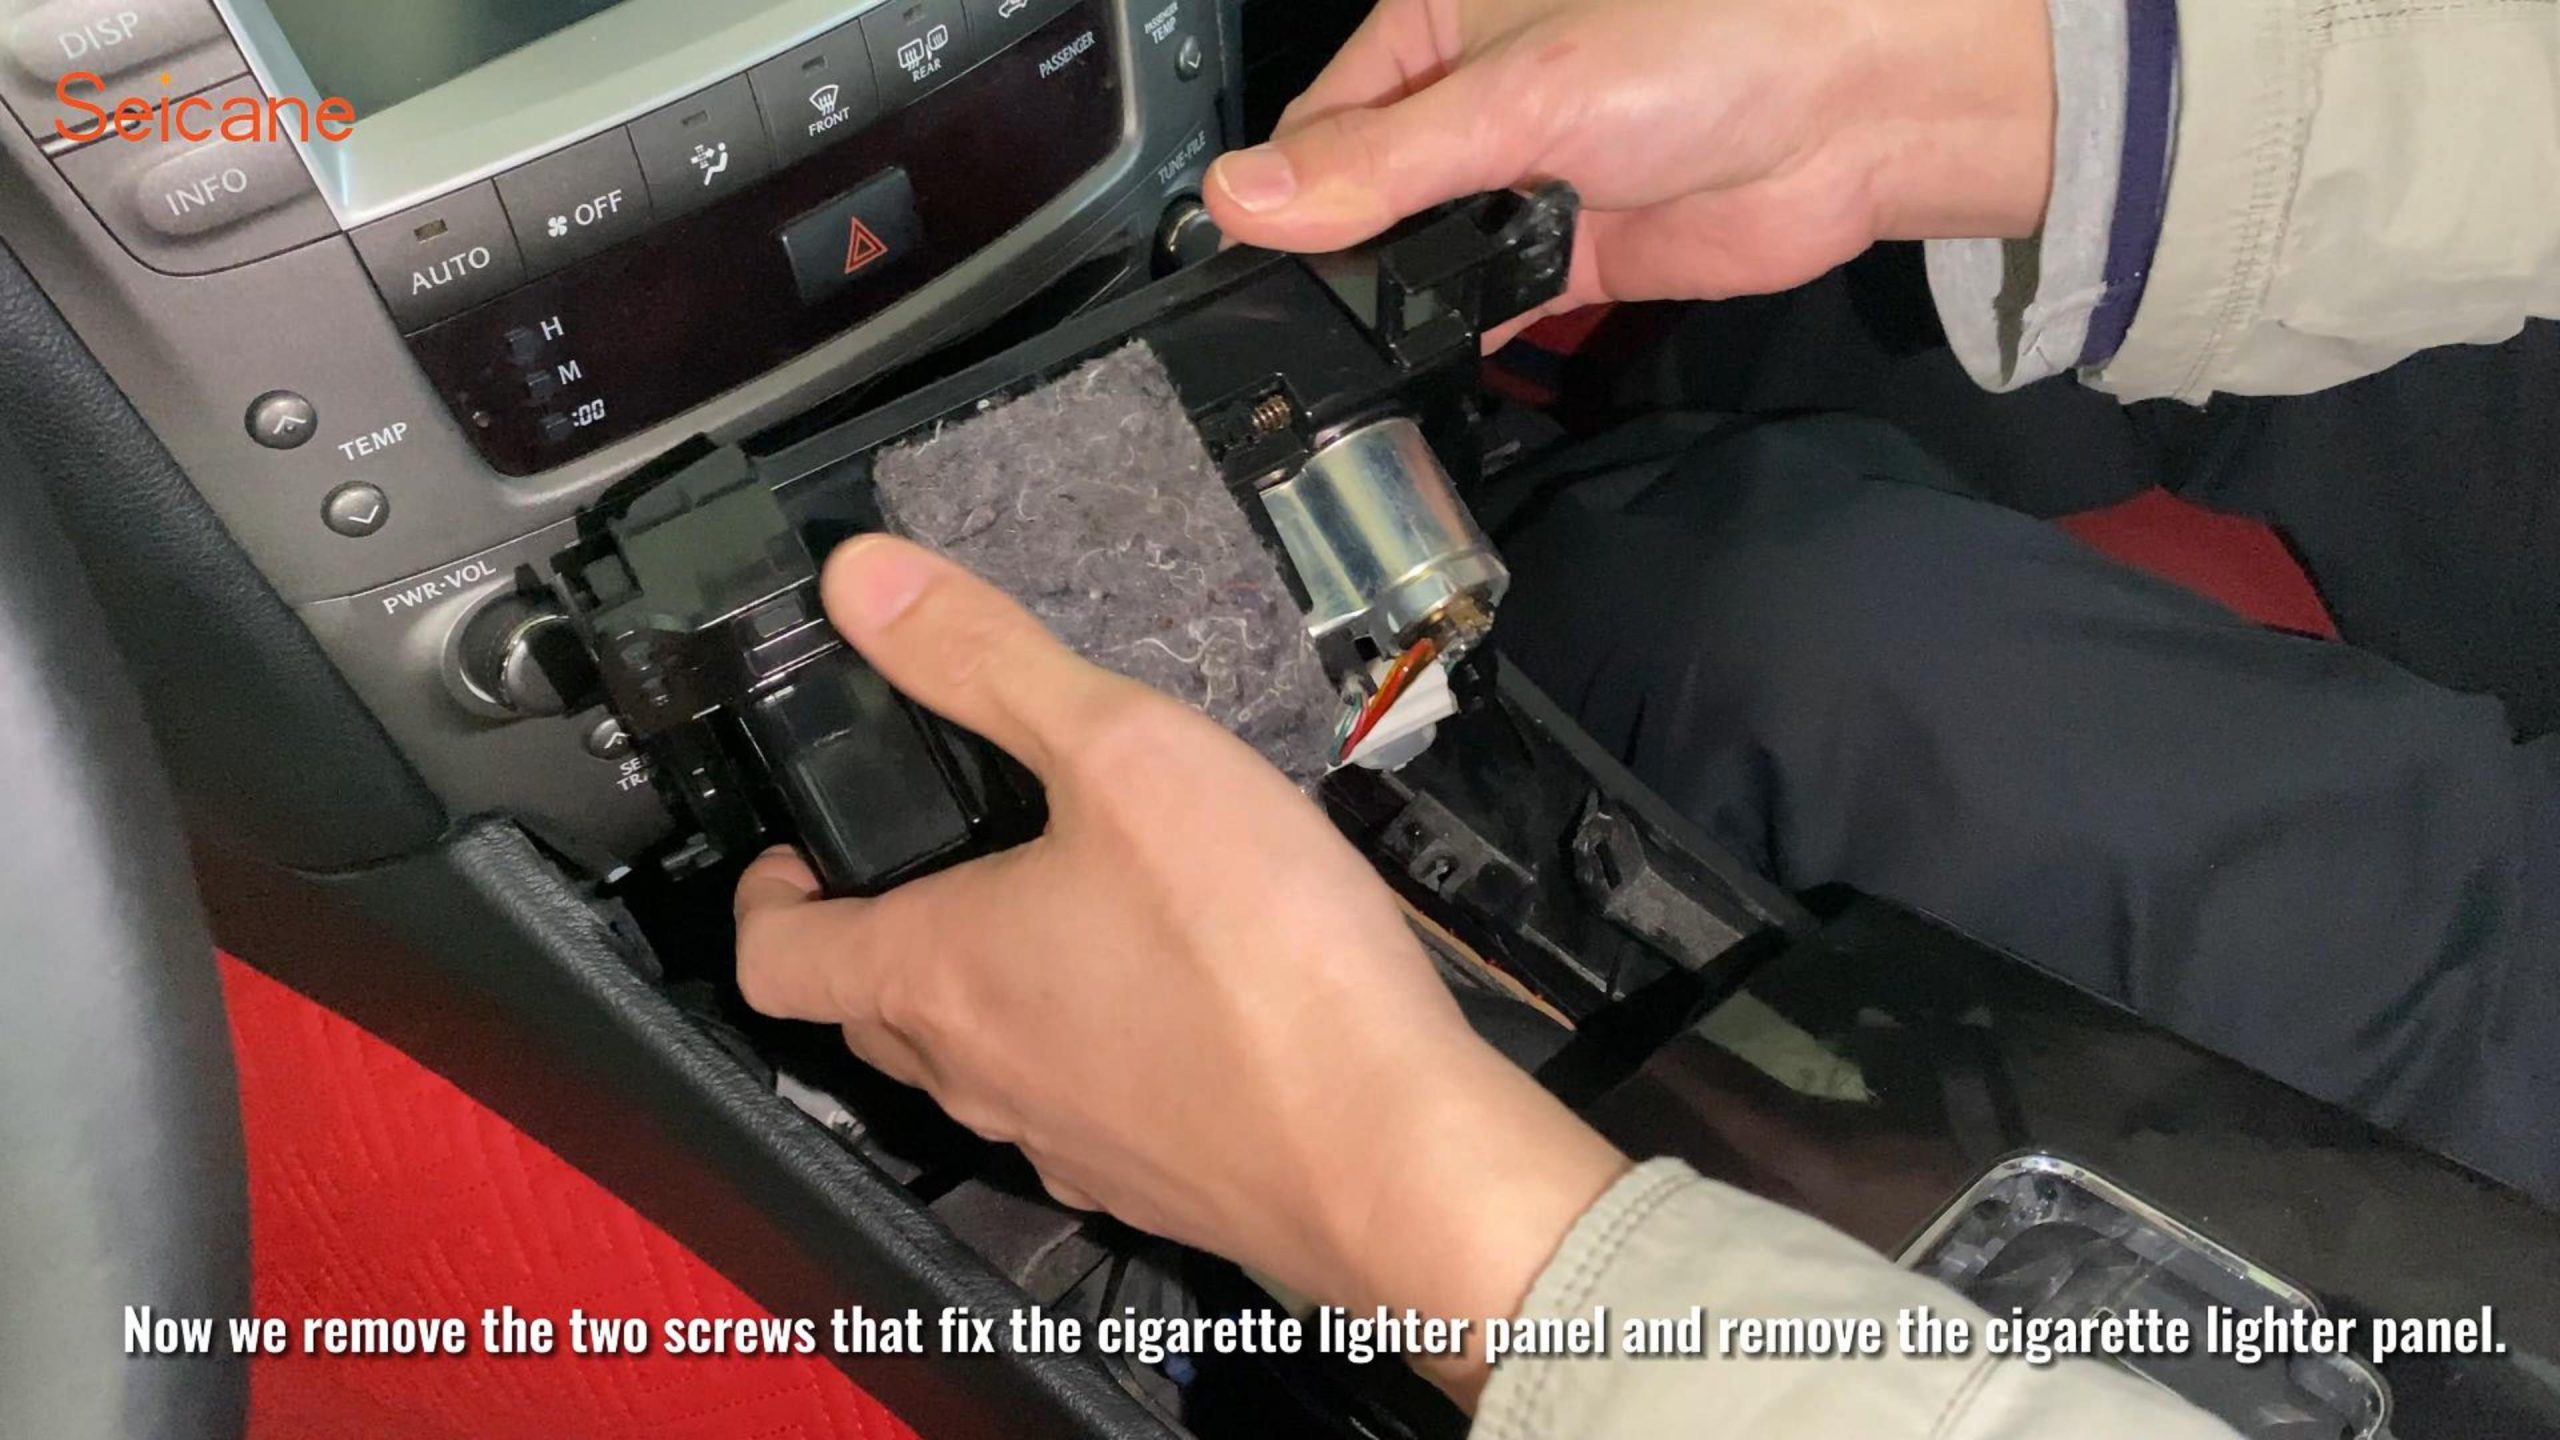
3.Remove the Cigarette Lighter Panel: Unscrew the two screws that fix the cigarette lighter panel and remove the panel.
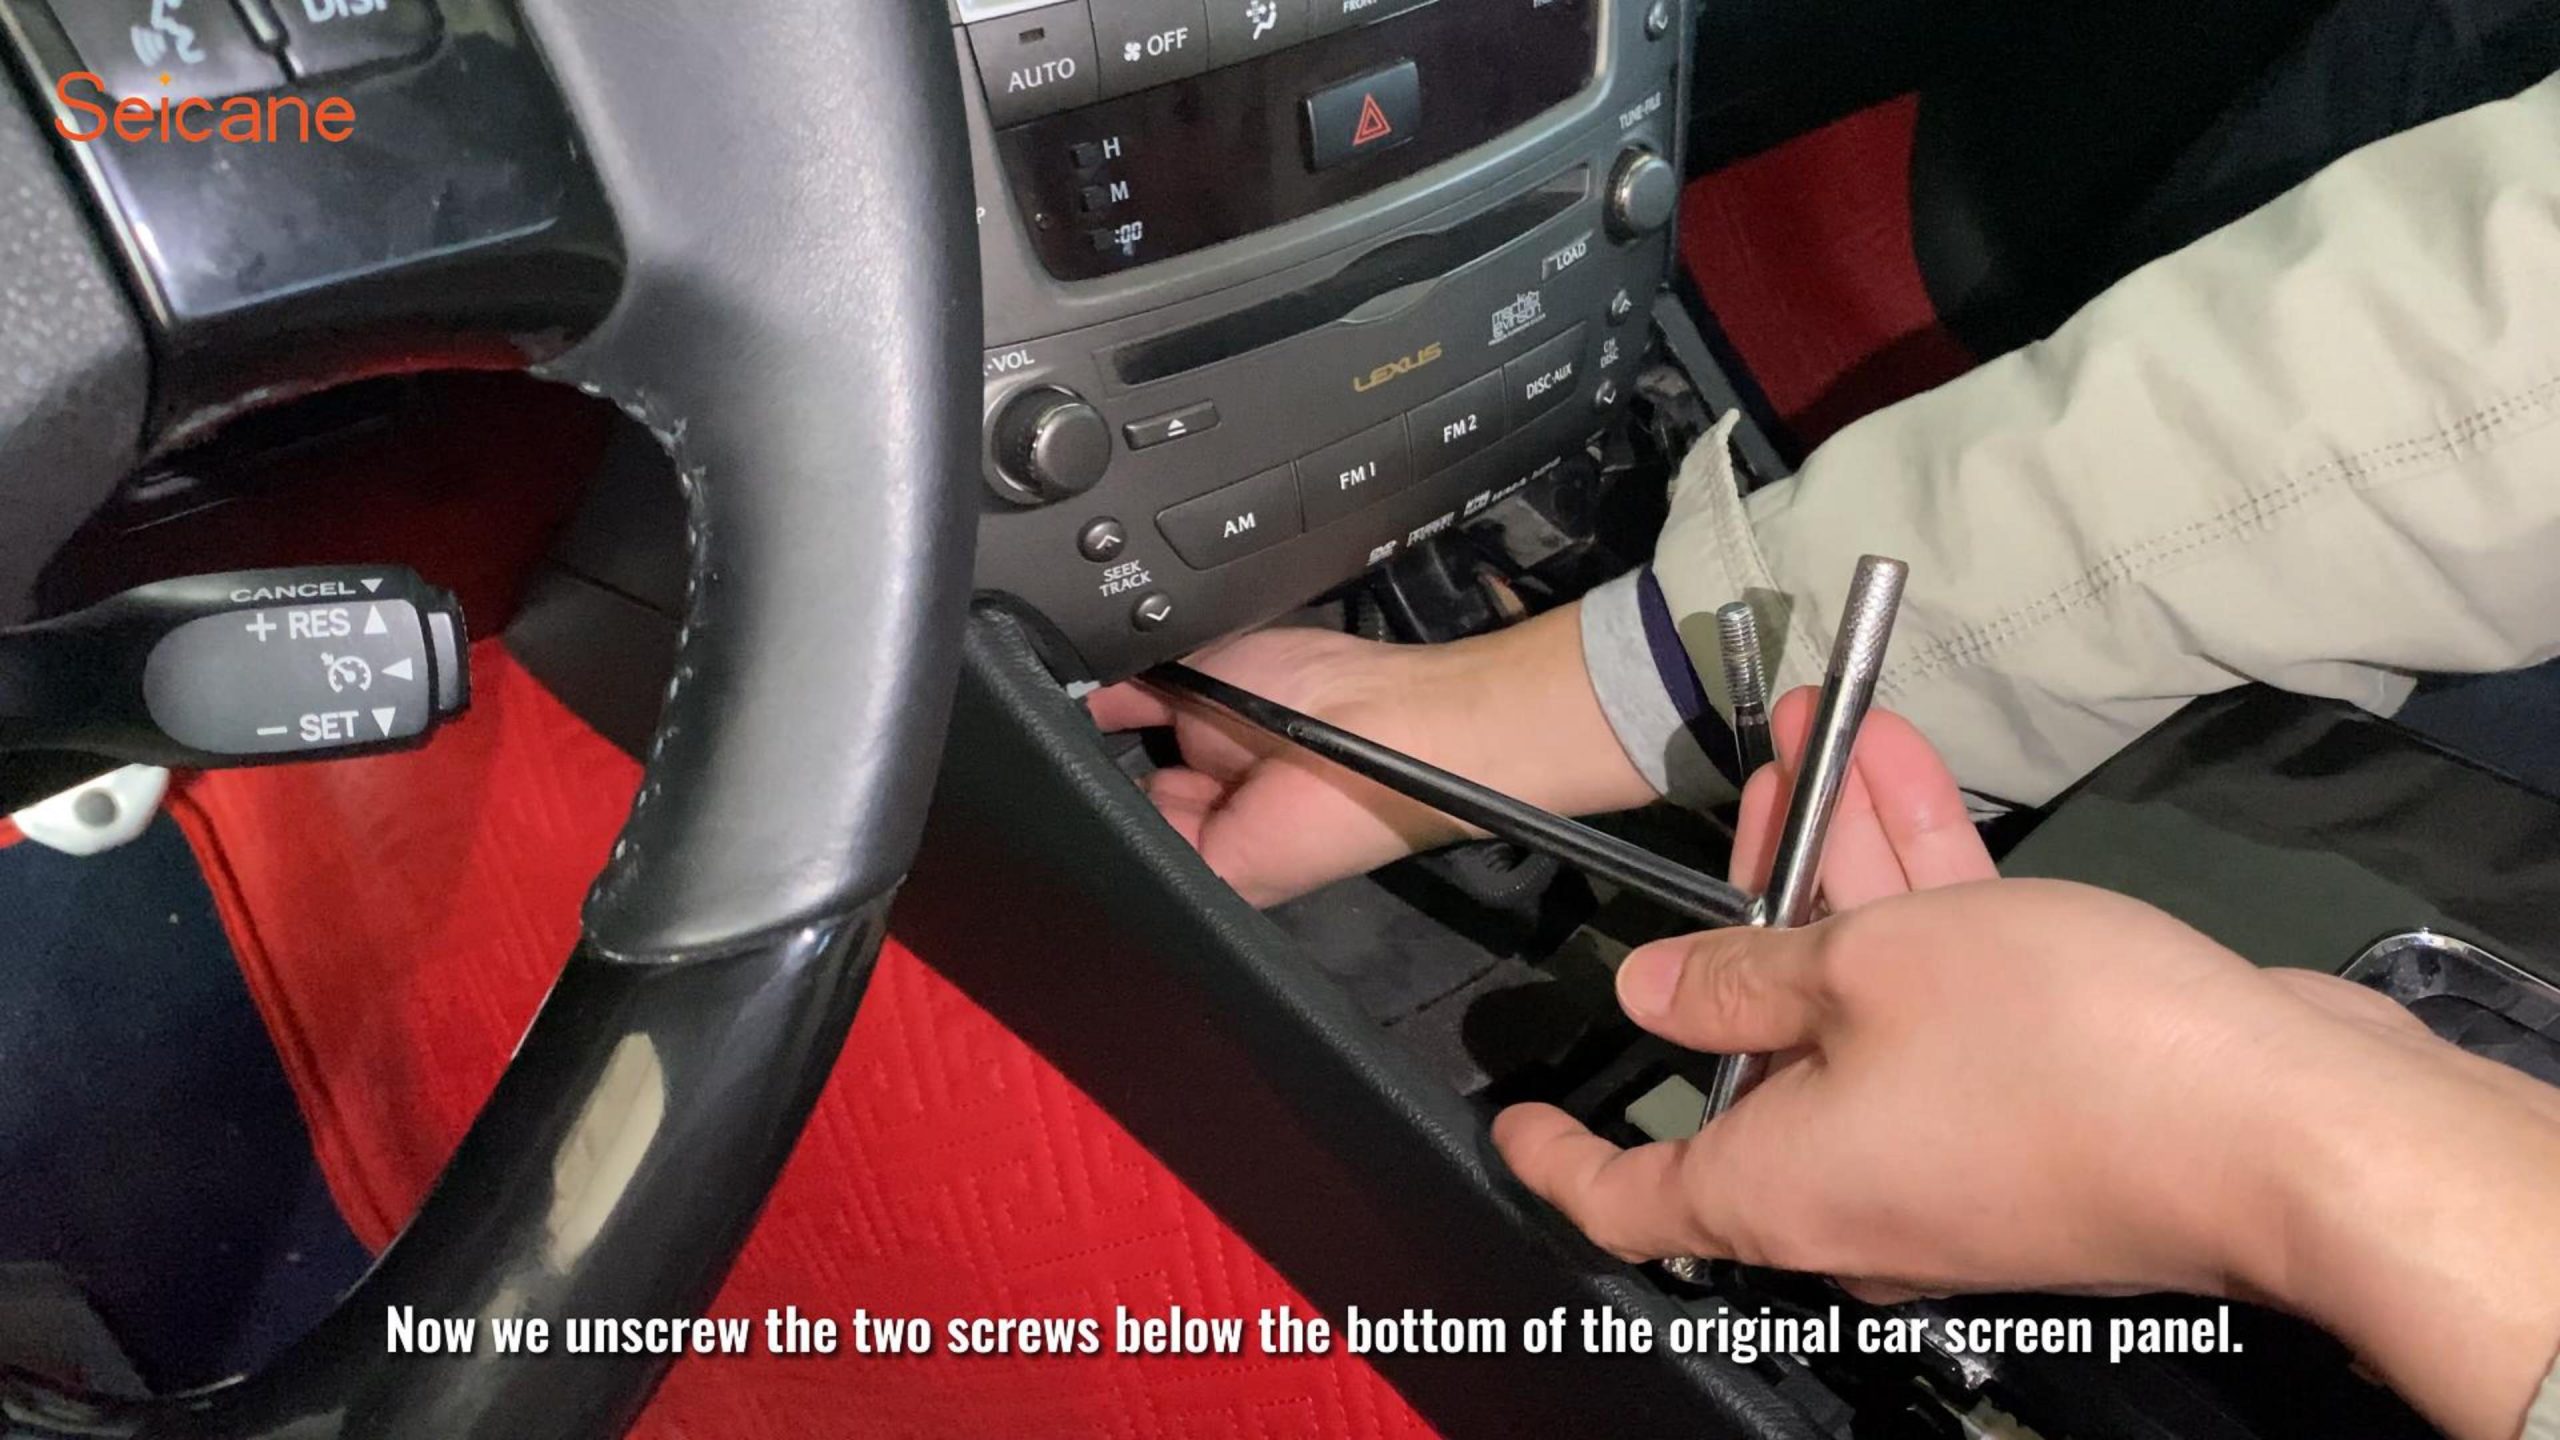
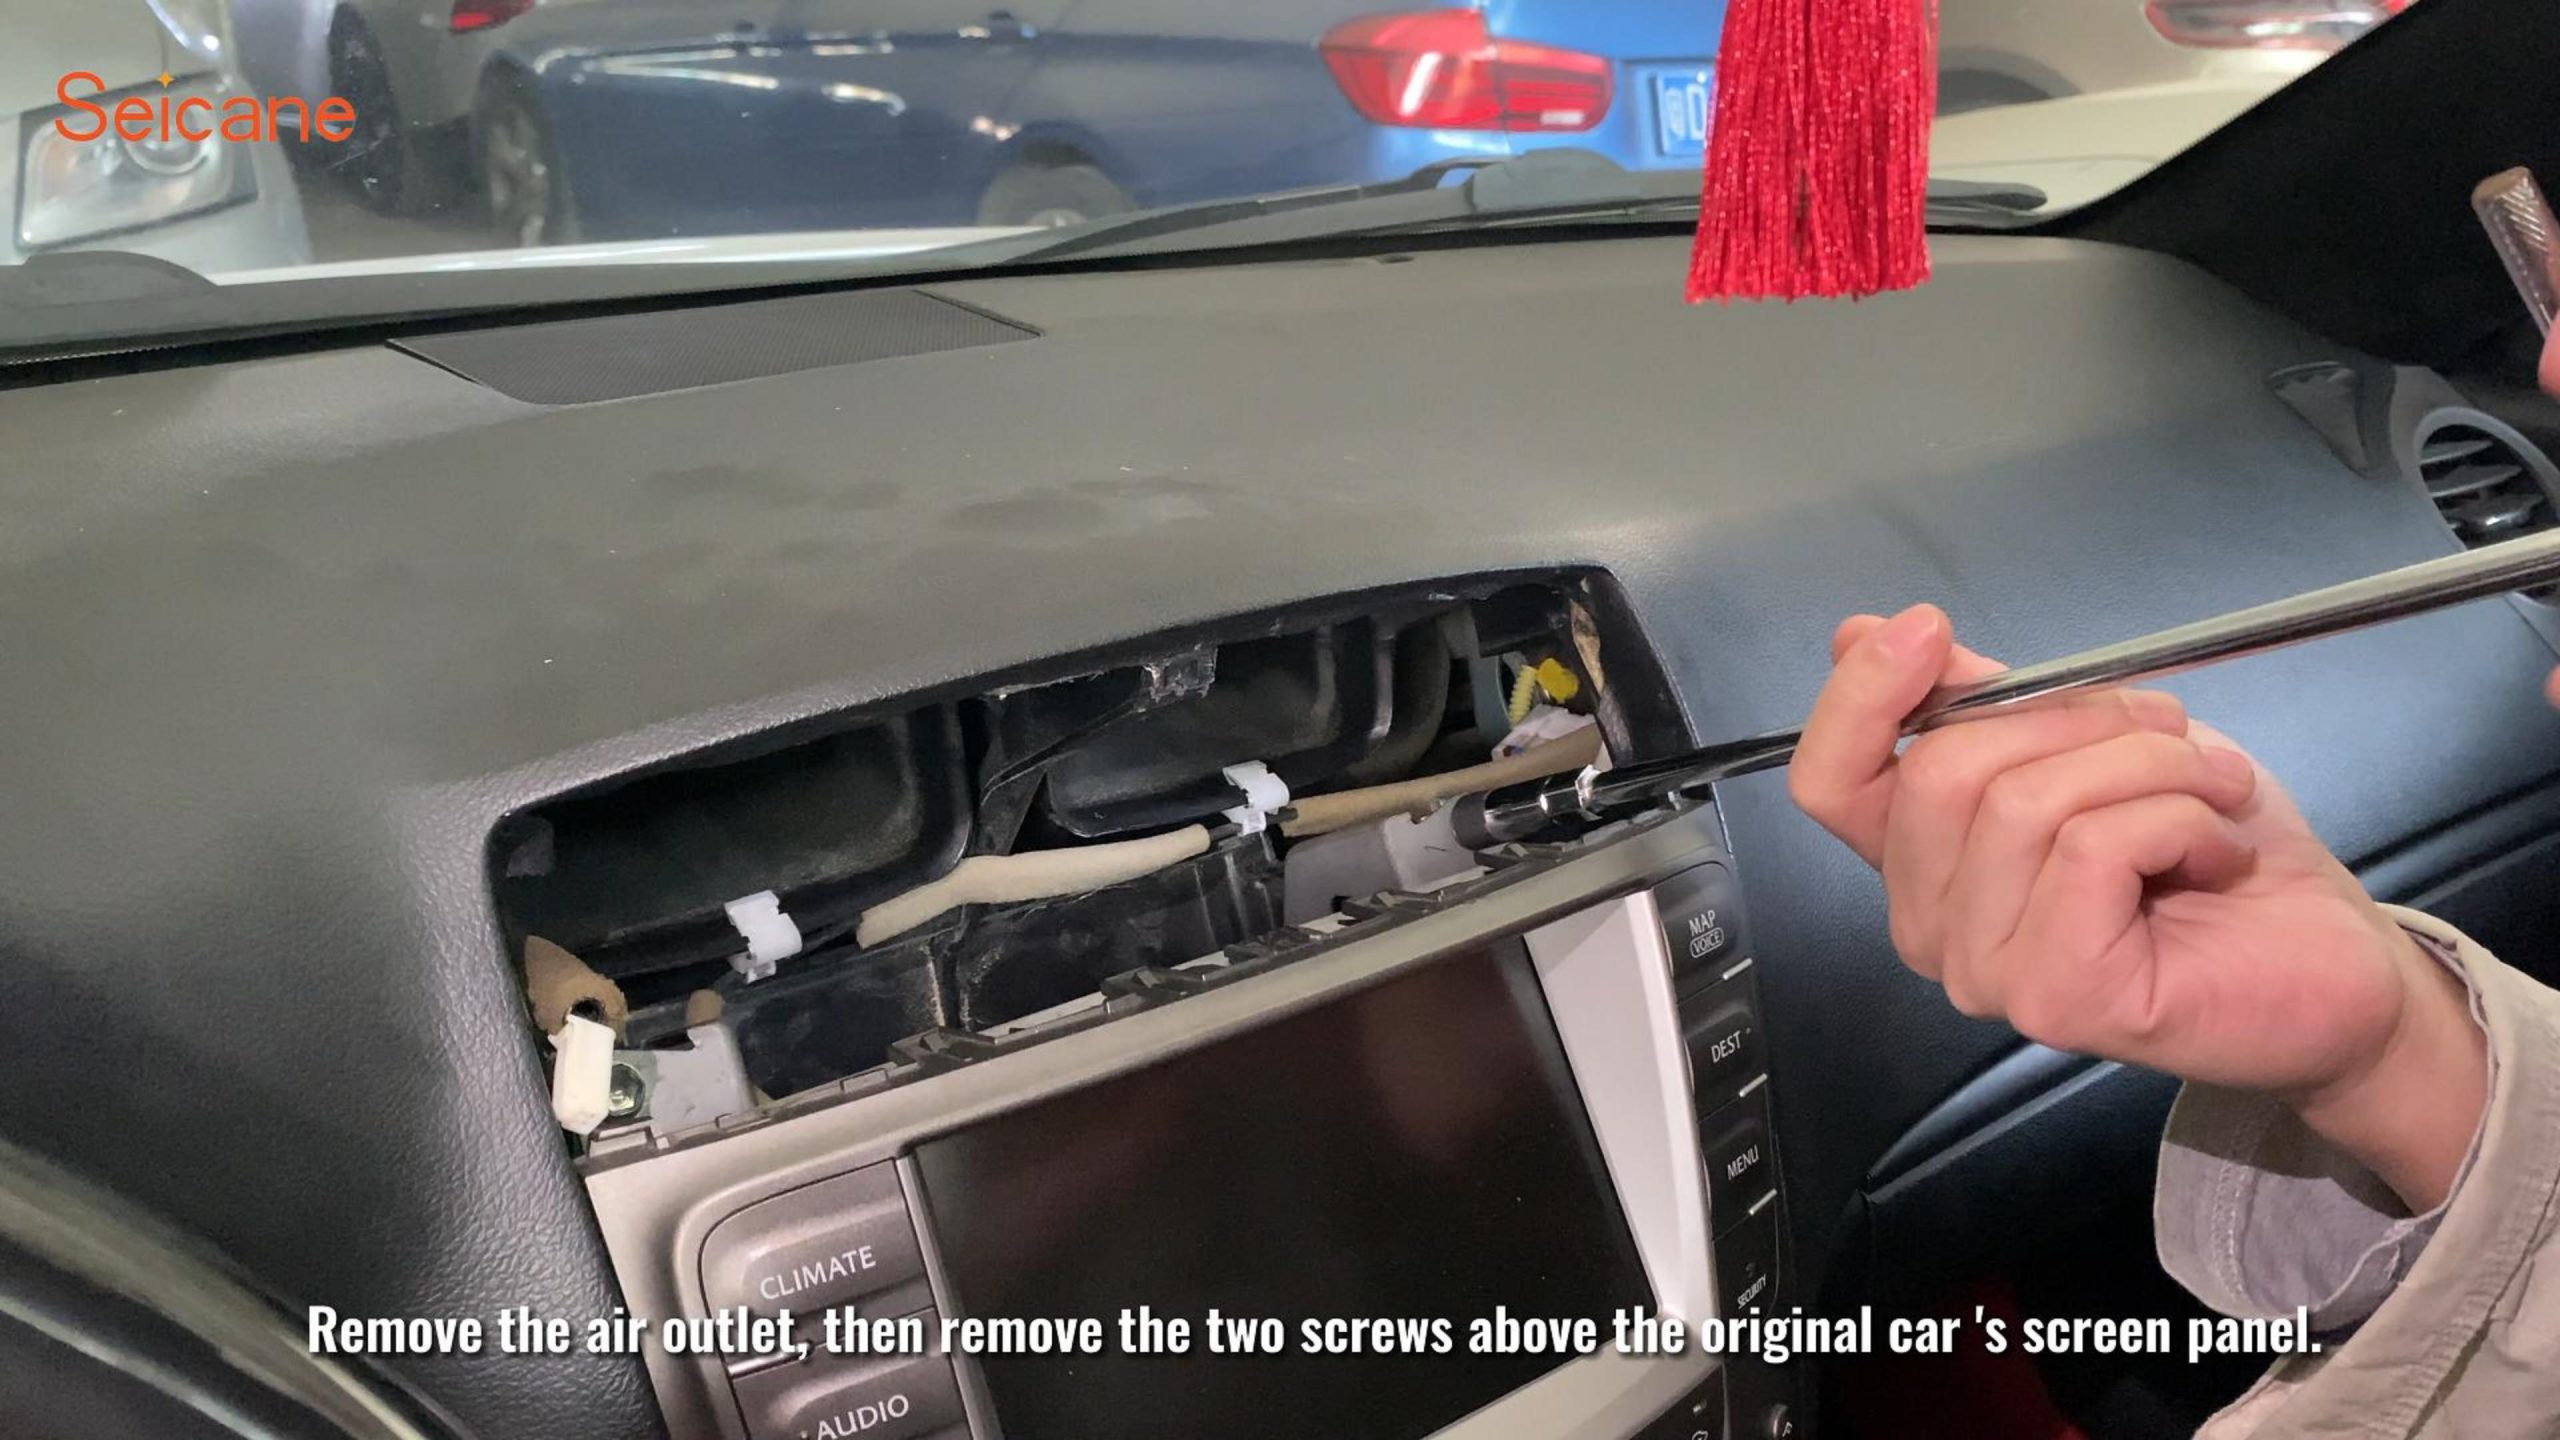
4.Unscrew the Bottom Screws: Unscrew the two screws at the bottom of the original car screen panel. Then remove the air outlet.
5.Unscrew the Top Screws: Remove the two screws above the original car screen panel.
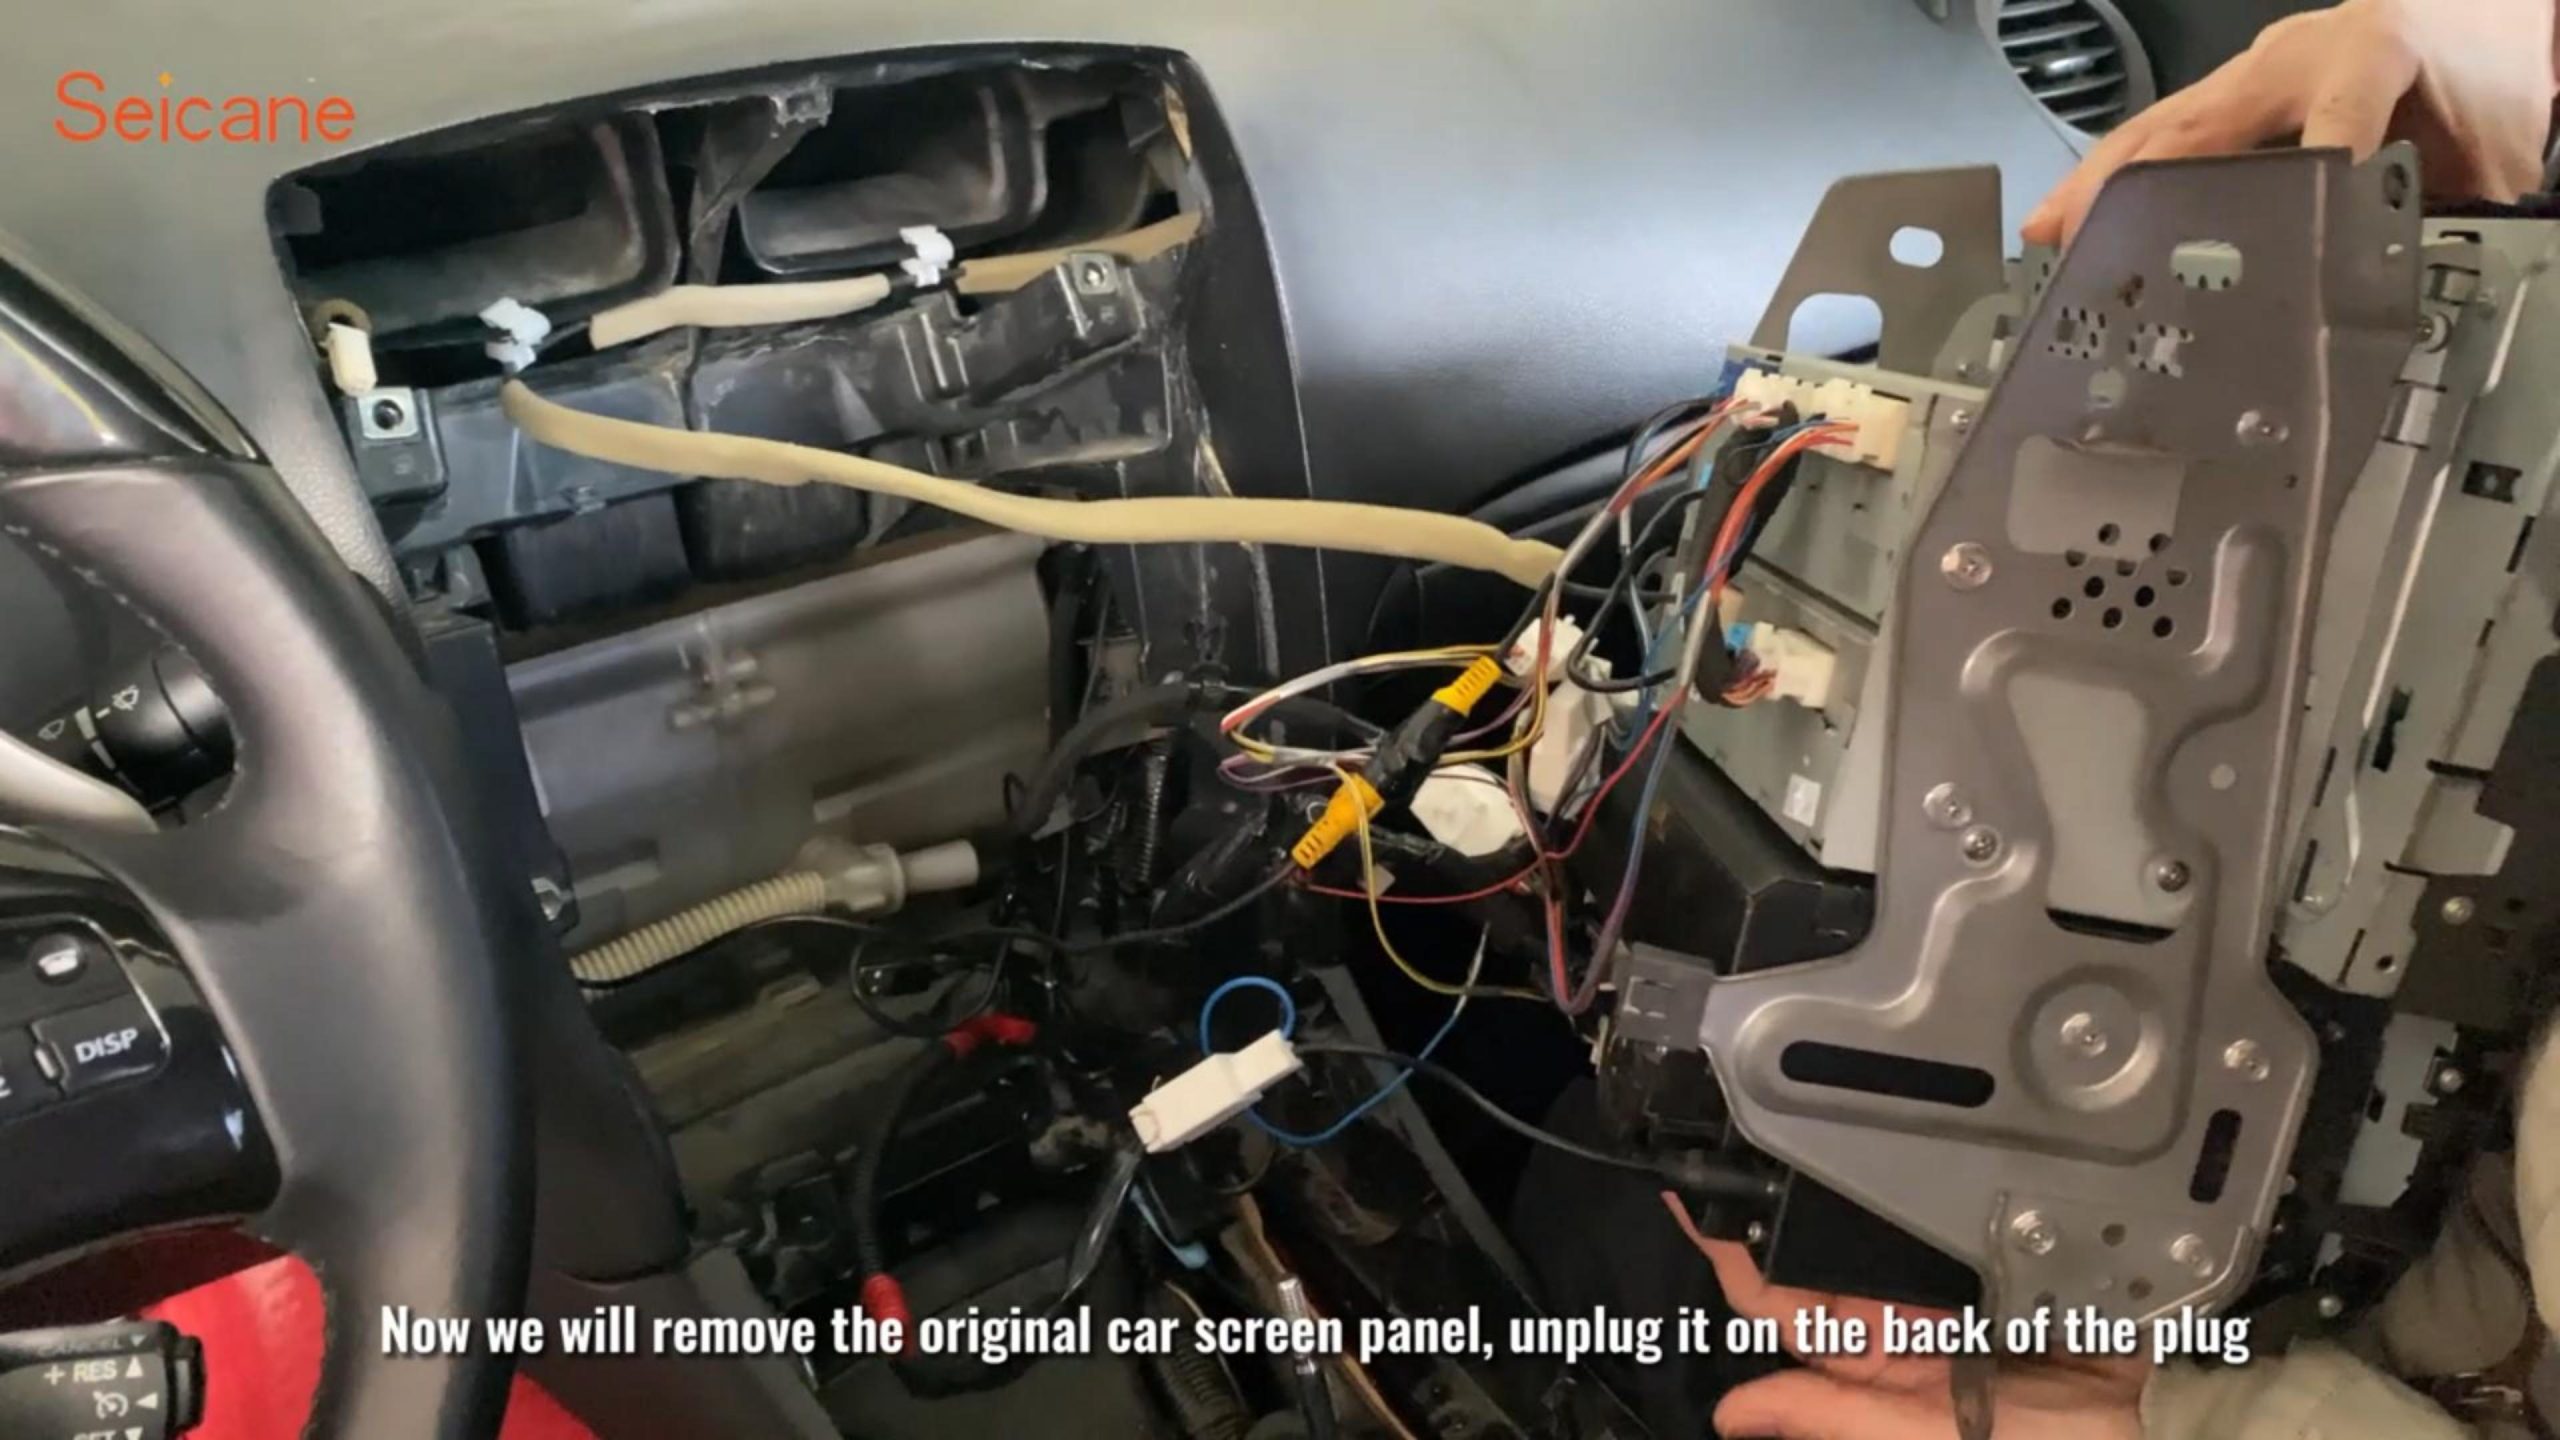
6.Remove the Original Car Screen Panel: Remove the original car screen panel and unplug it from the back.
After removal, here’s how to install the new system:
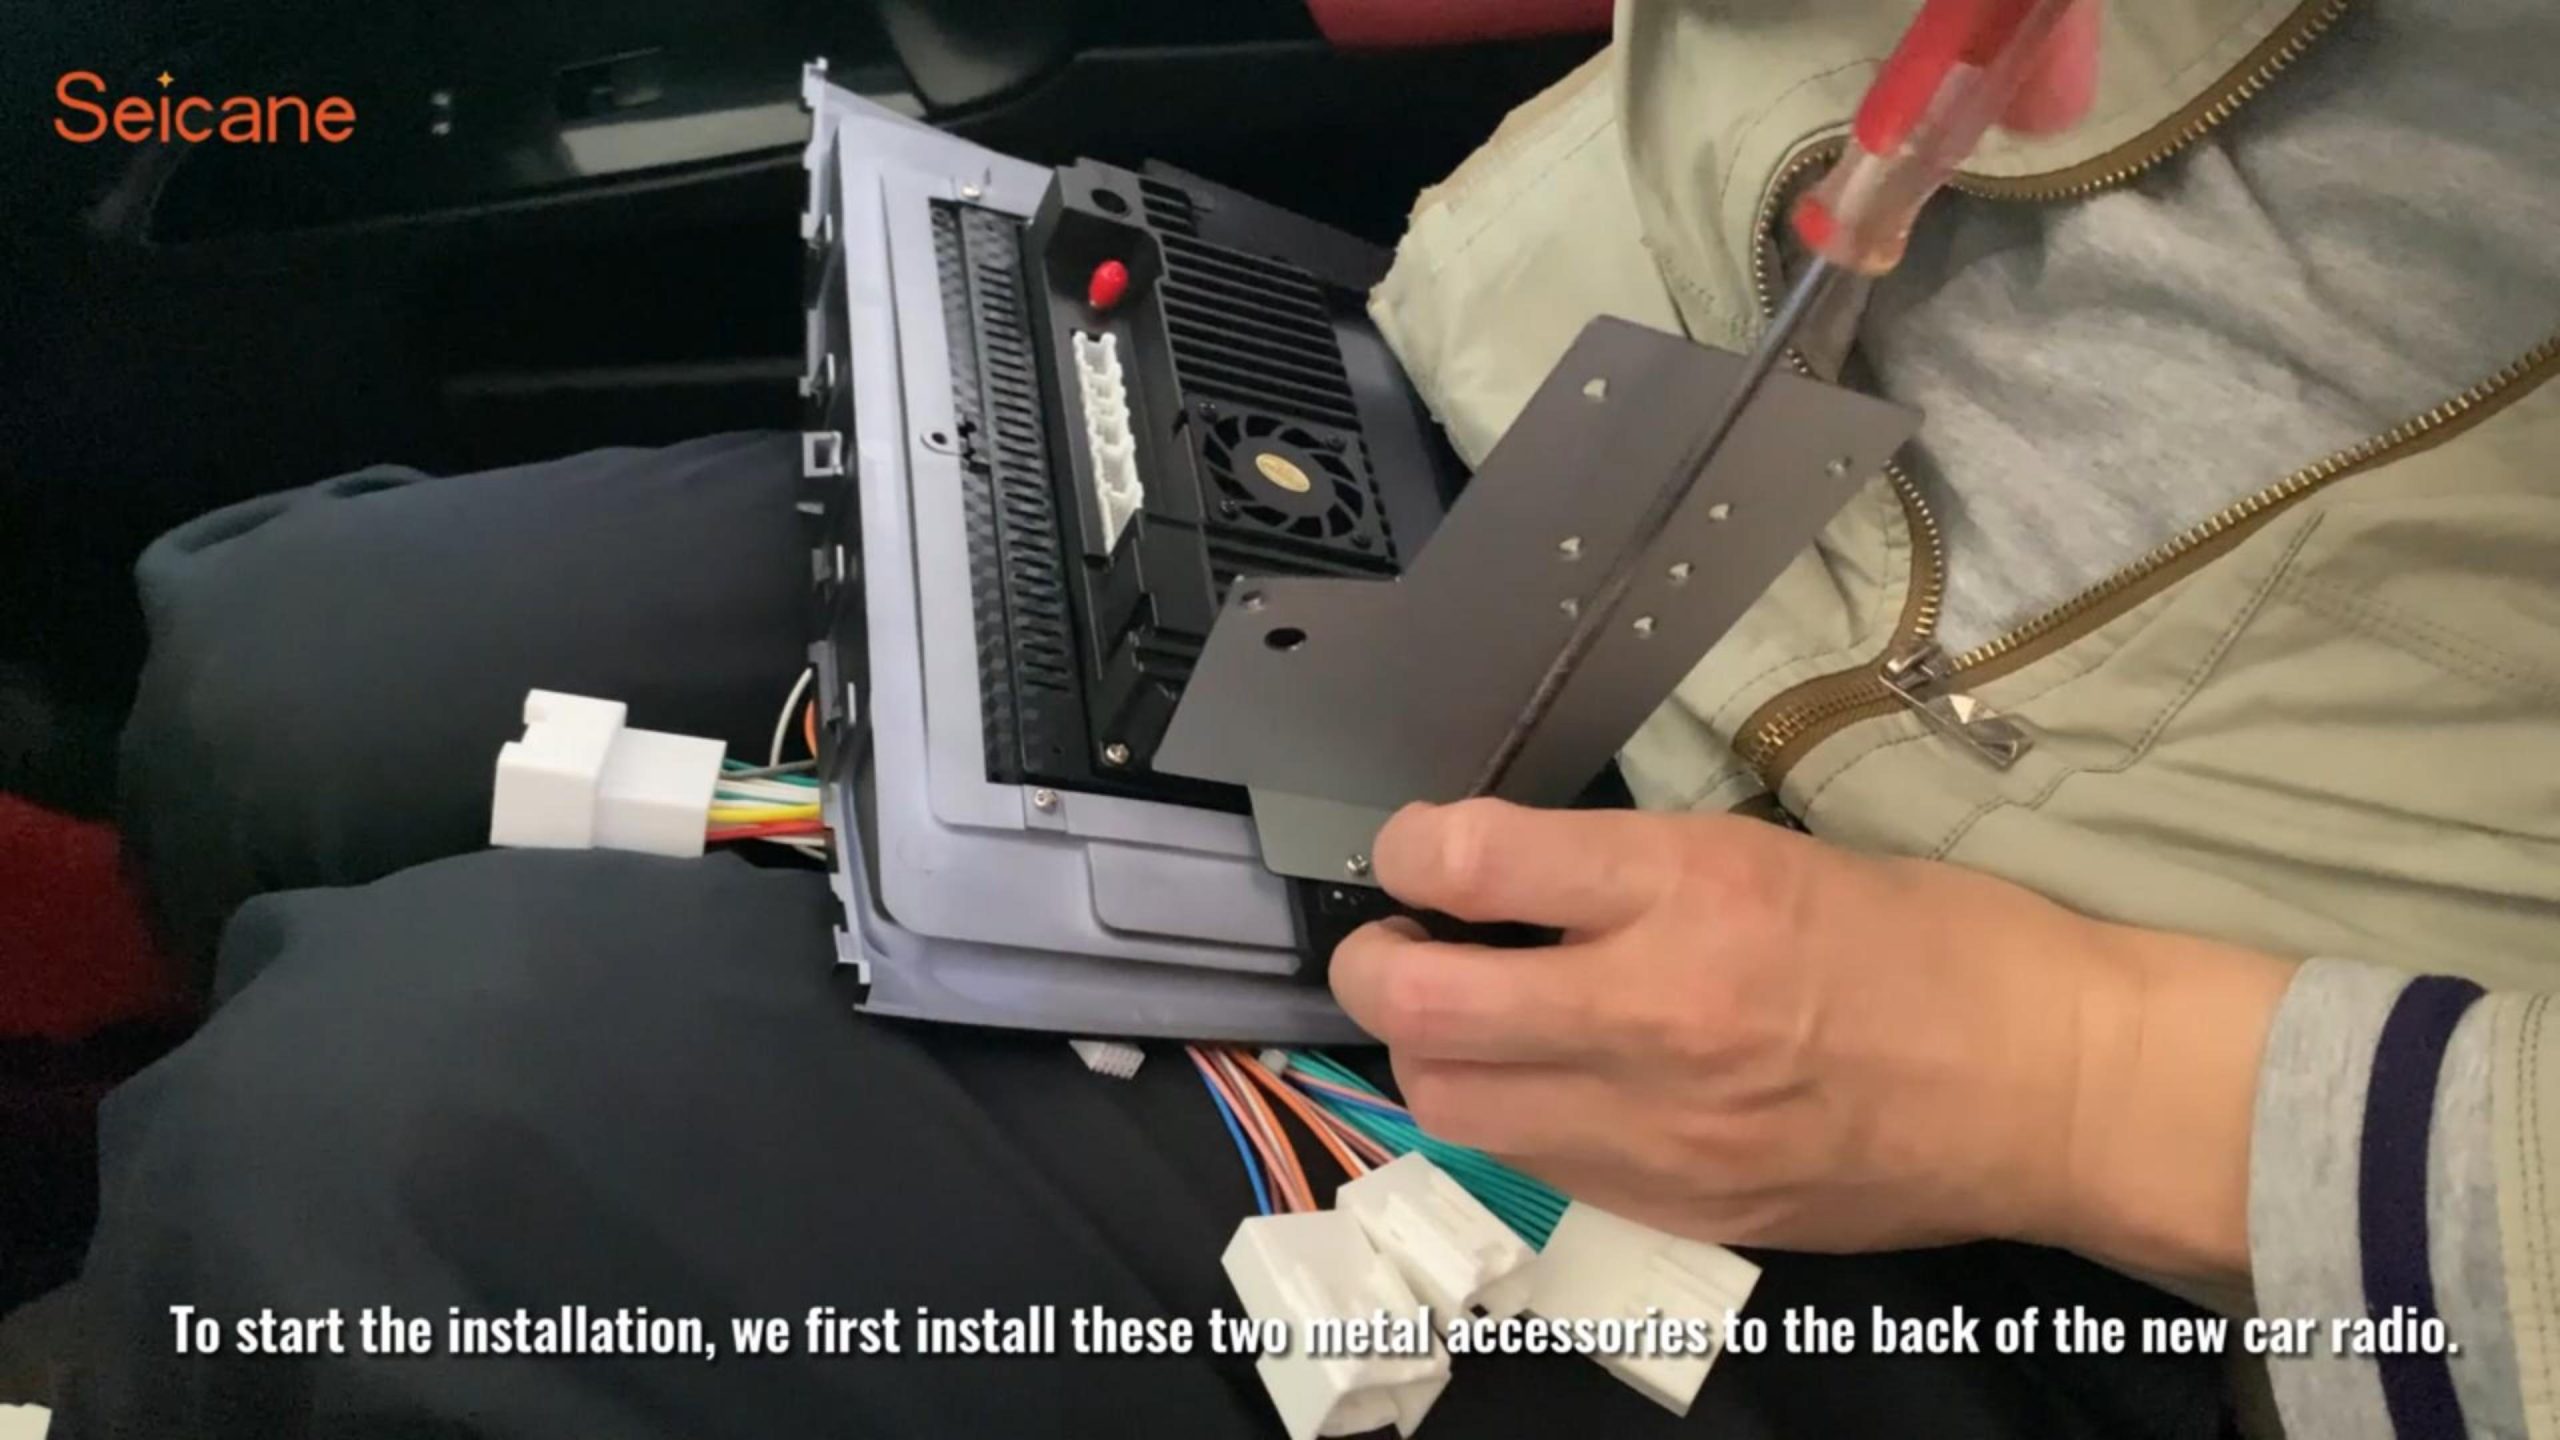
1.Install Metal Accessories: Attach the two metal accessories to the back of the new car radio.
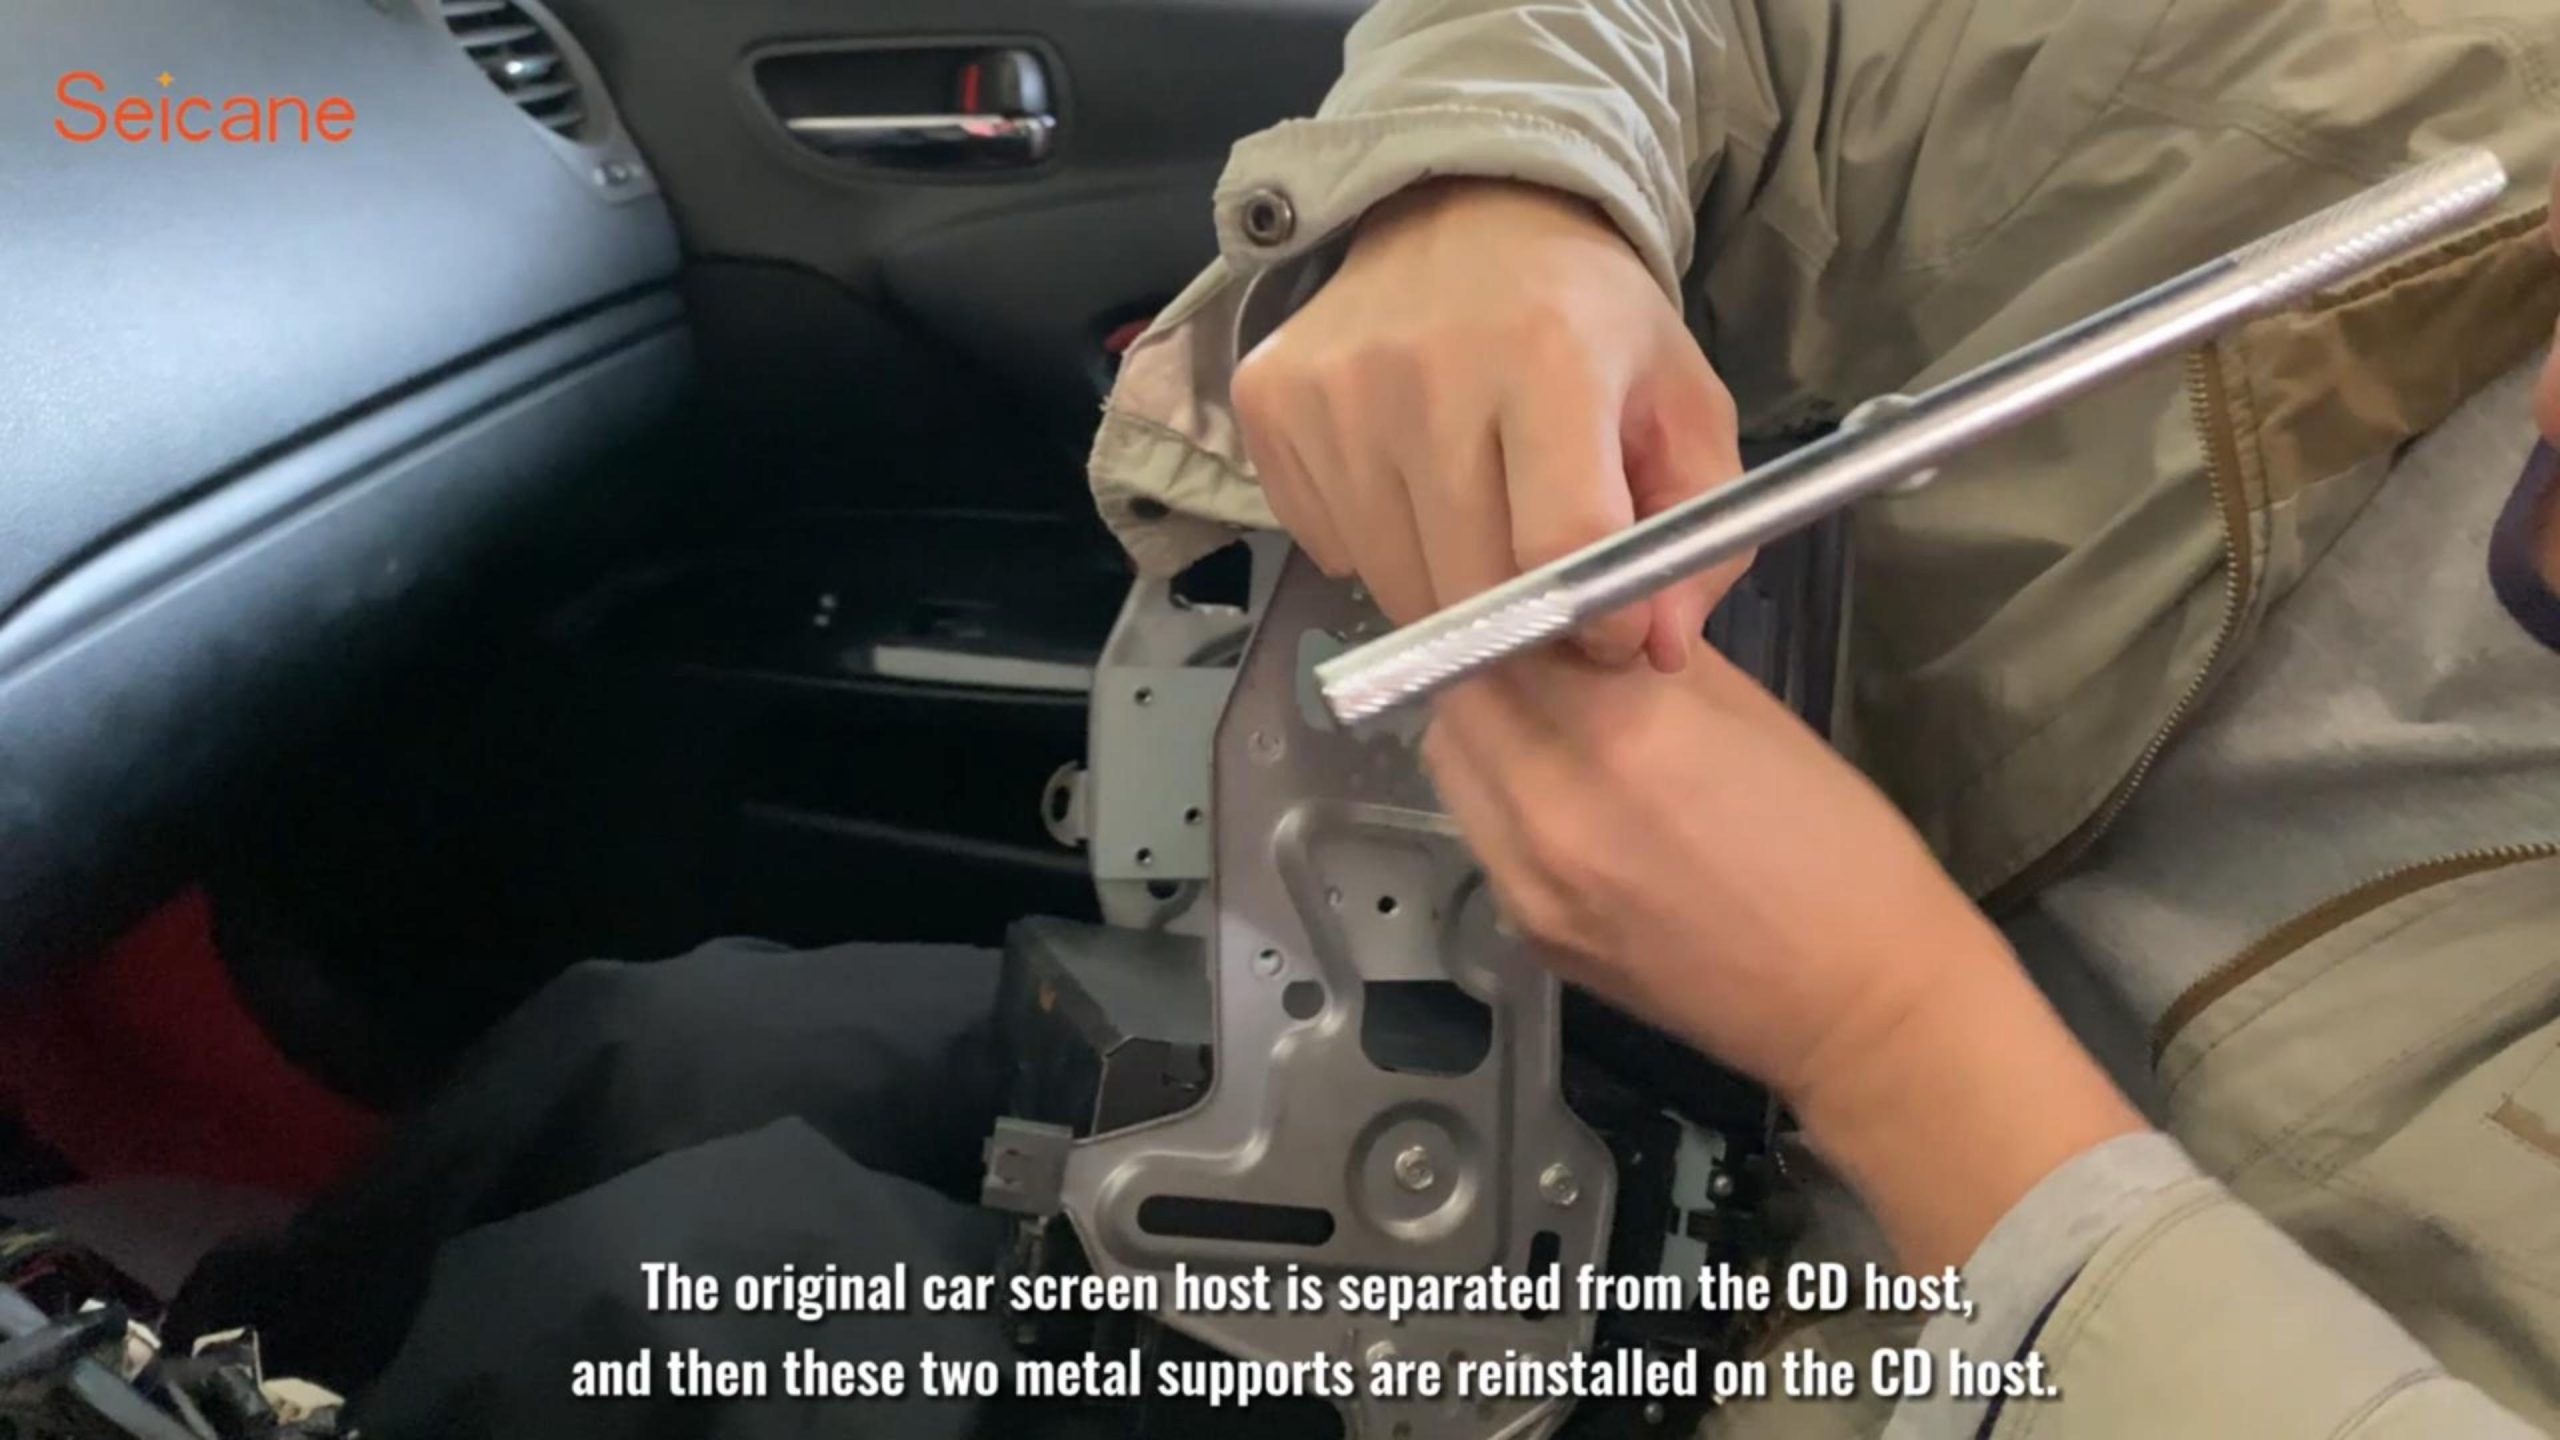
2.Remove the Original Screen’s Metal Part: Separate the original screen host from the CD host. Reinstall the two metal supports on the CD host.
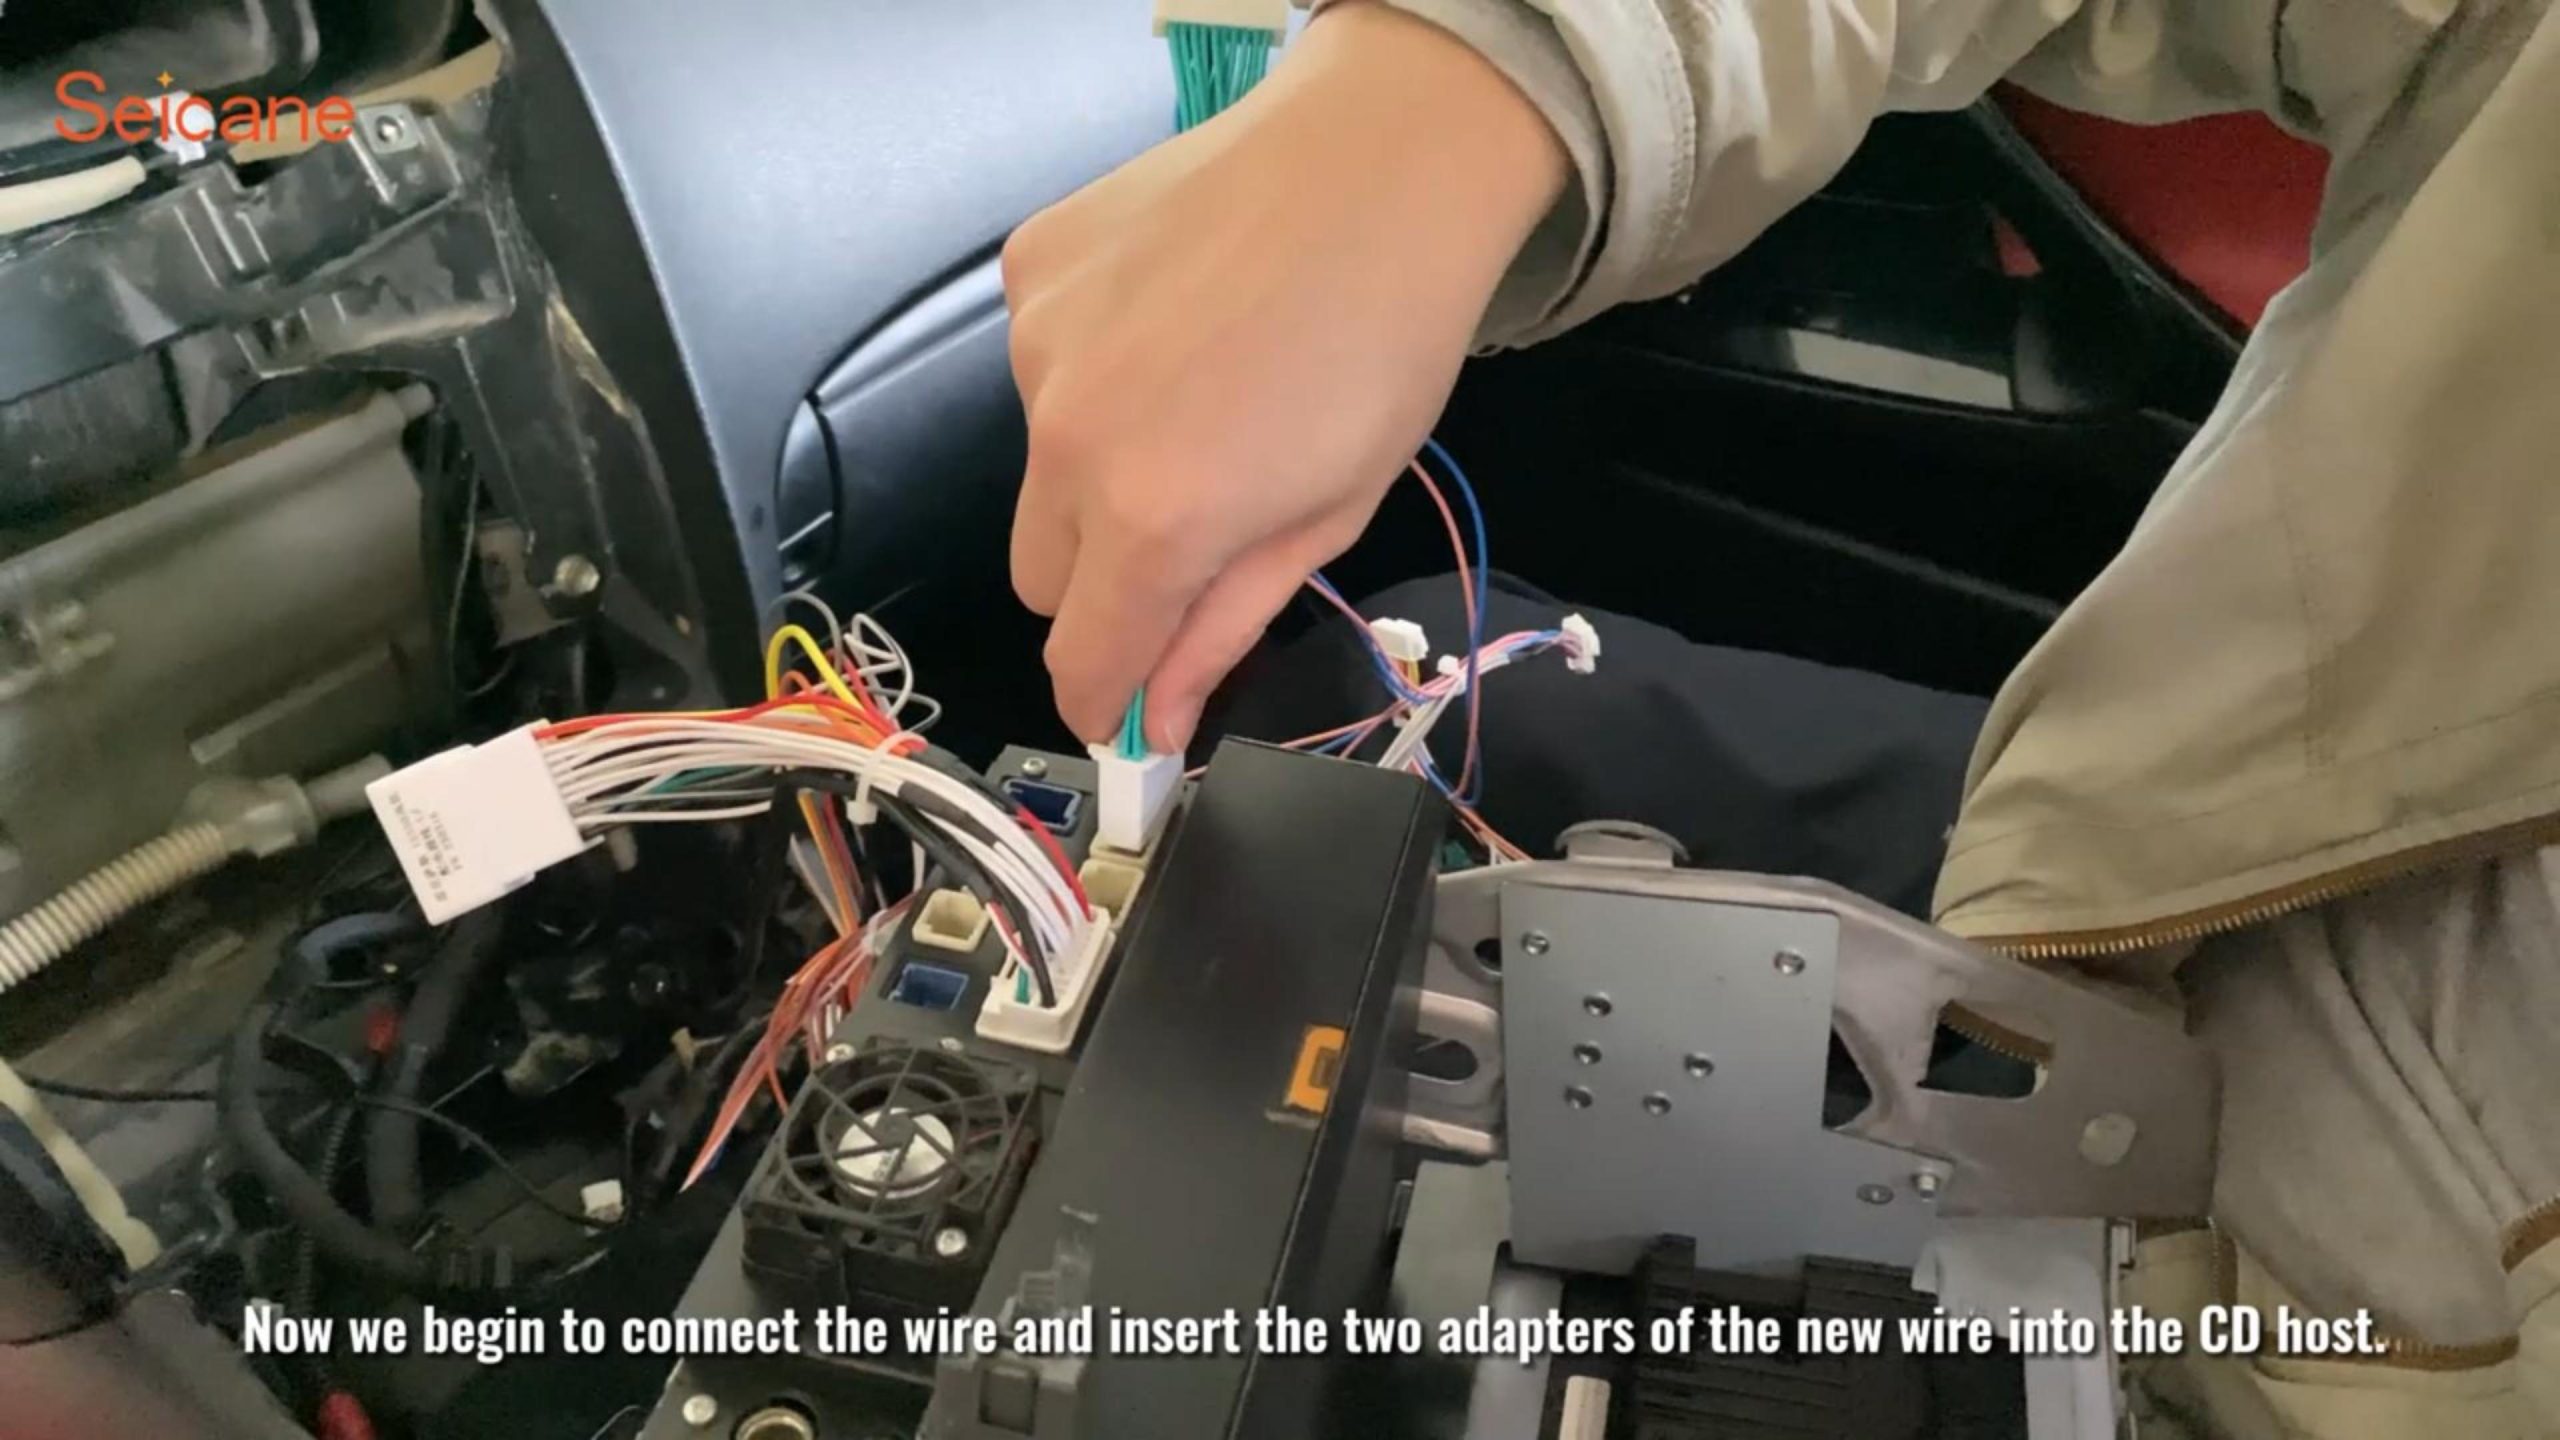
3.Connect Wires: Insert the two adapters of the new wire into the CD host. Insert the k-pad plug into the new screen. Connect the screen power supply, the communication serial port line, the canvas box, and the OBD interface cable. Insert the other end into the original car OBD interface.
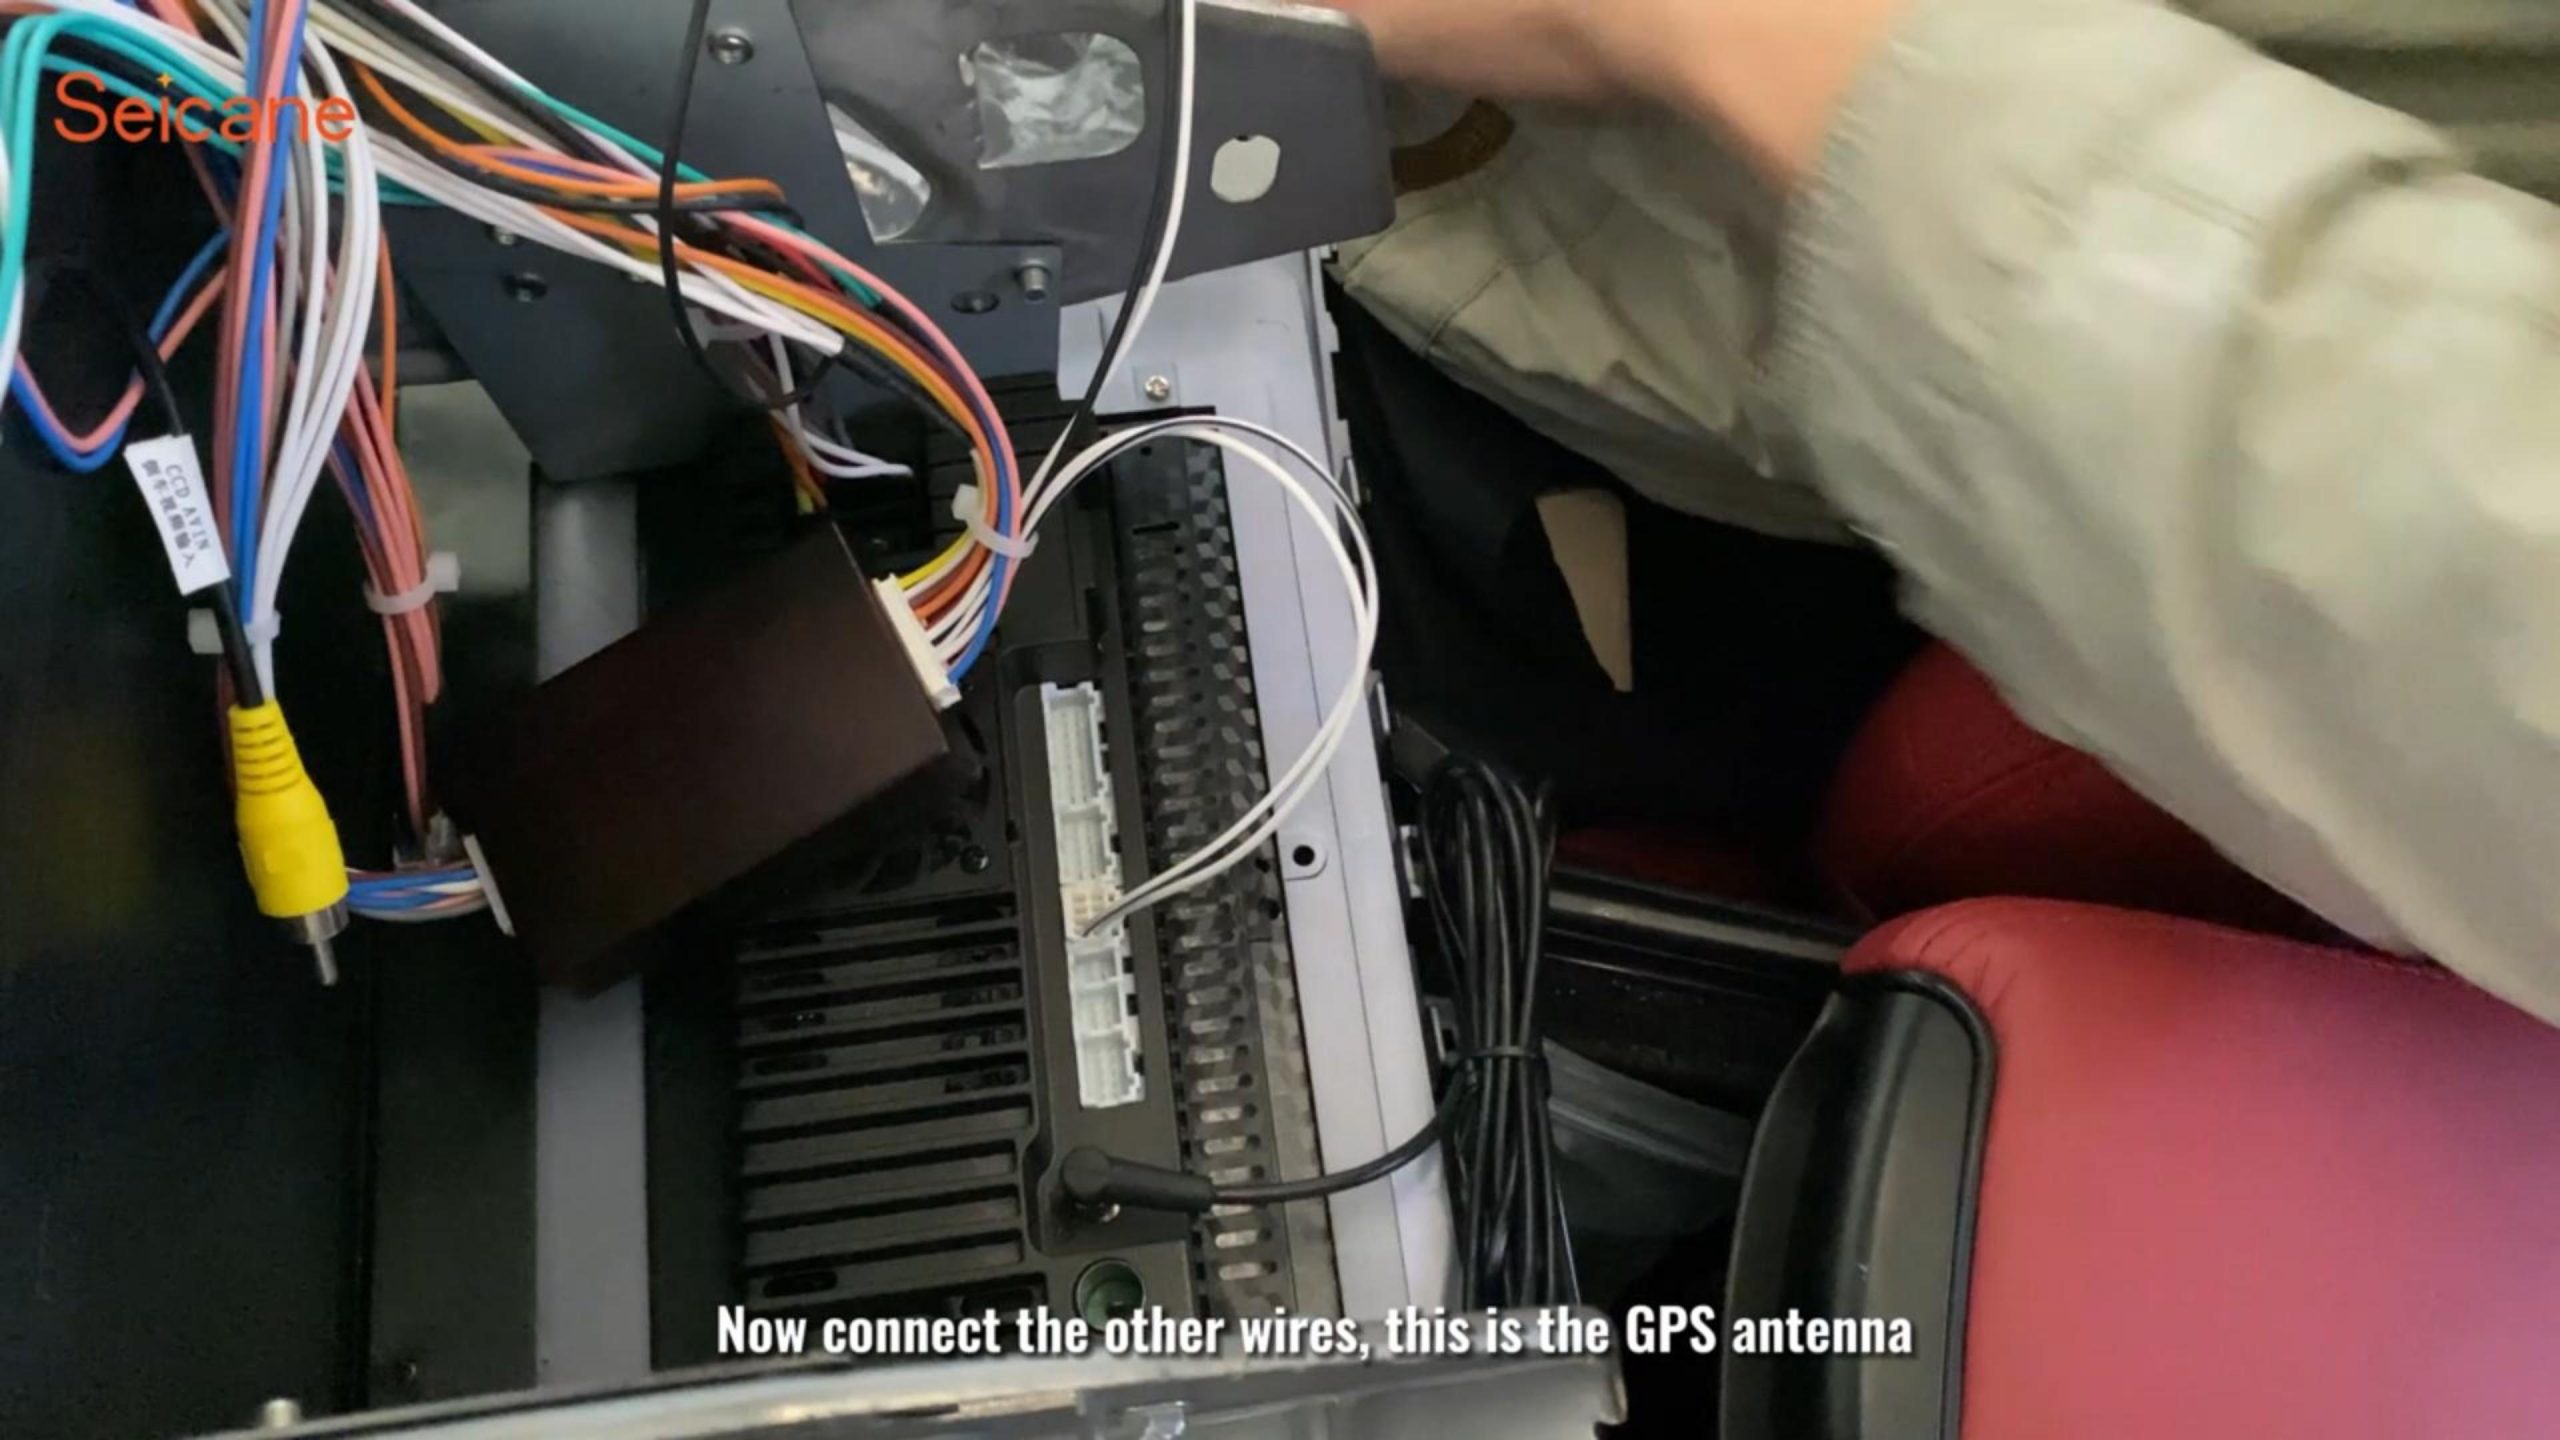
4.Connect Additional Wires: Connect the GPS antenna, video input line, USB transmission line, and the RC line. The red and white plugs on the power wire are connected to the EU plug of RC CA.
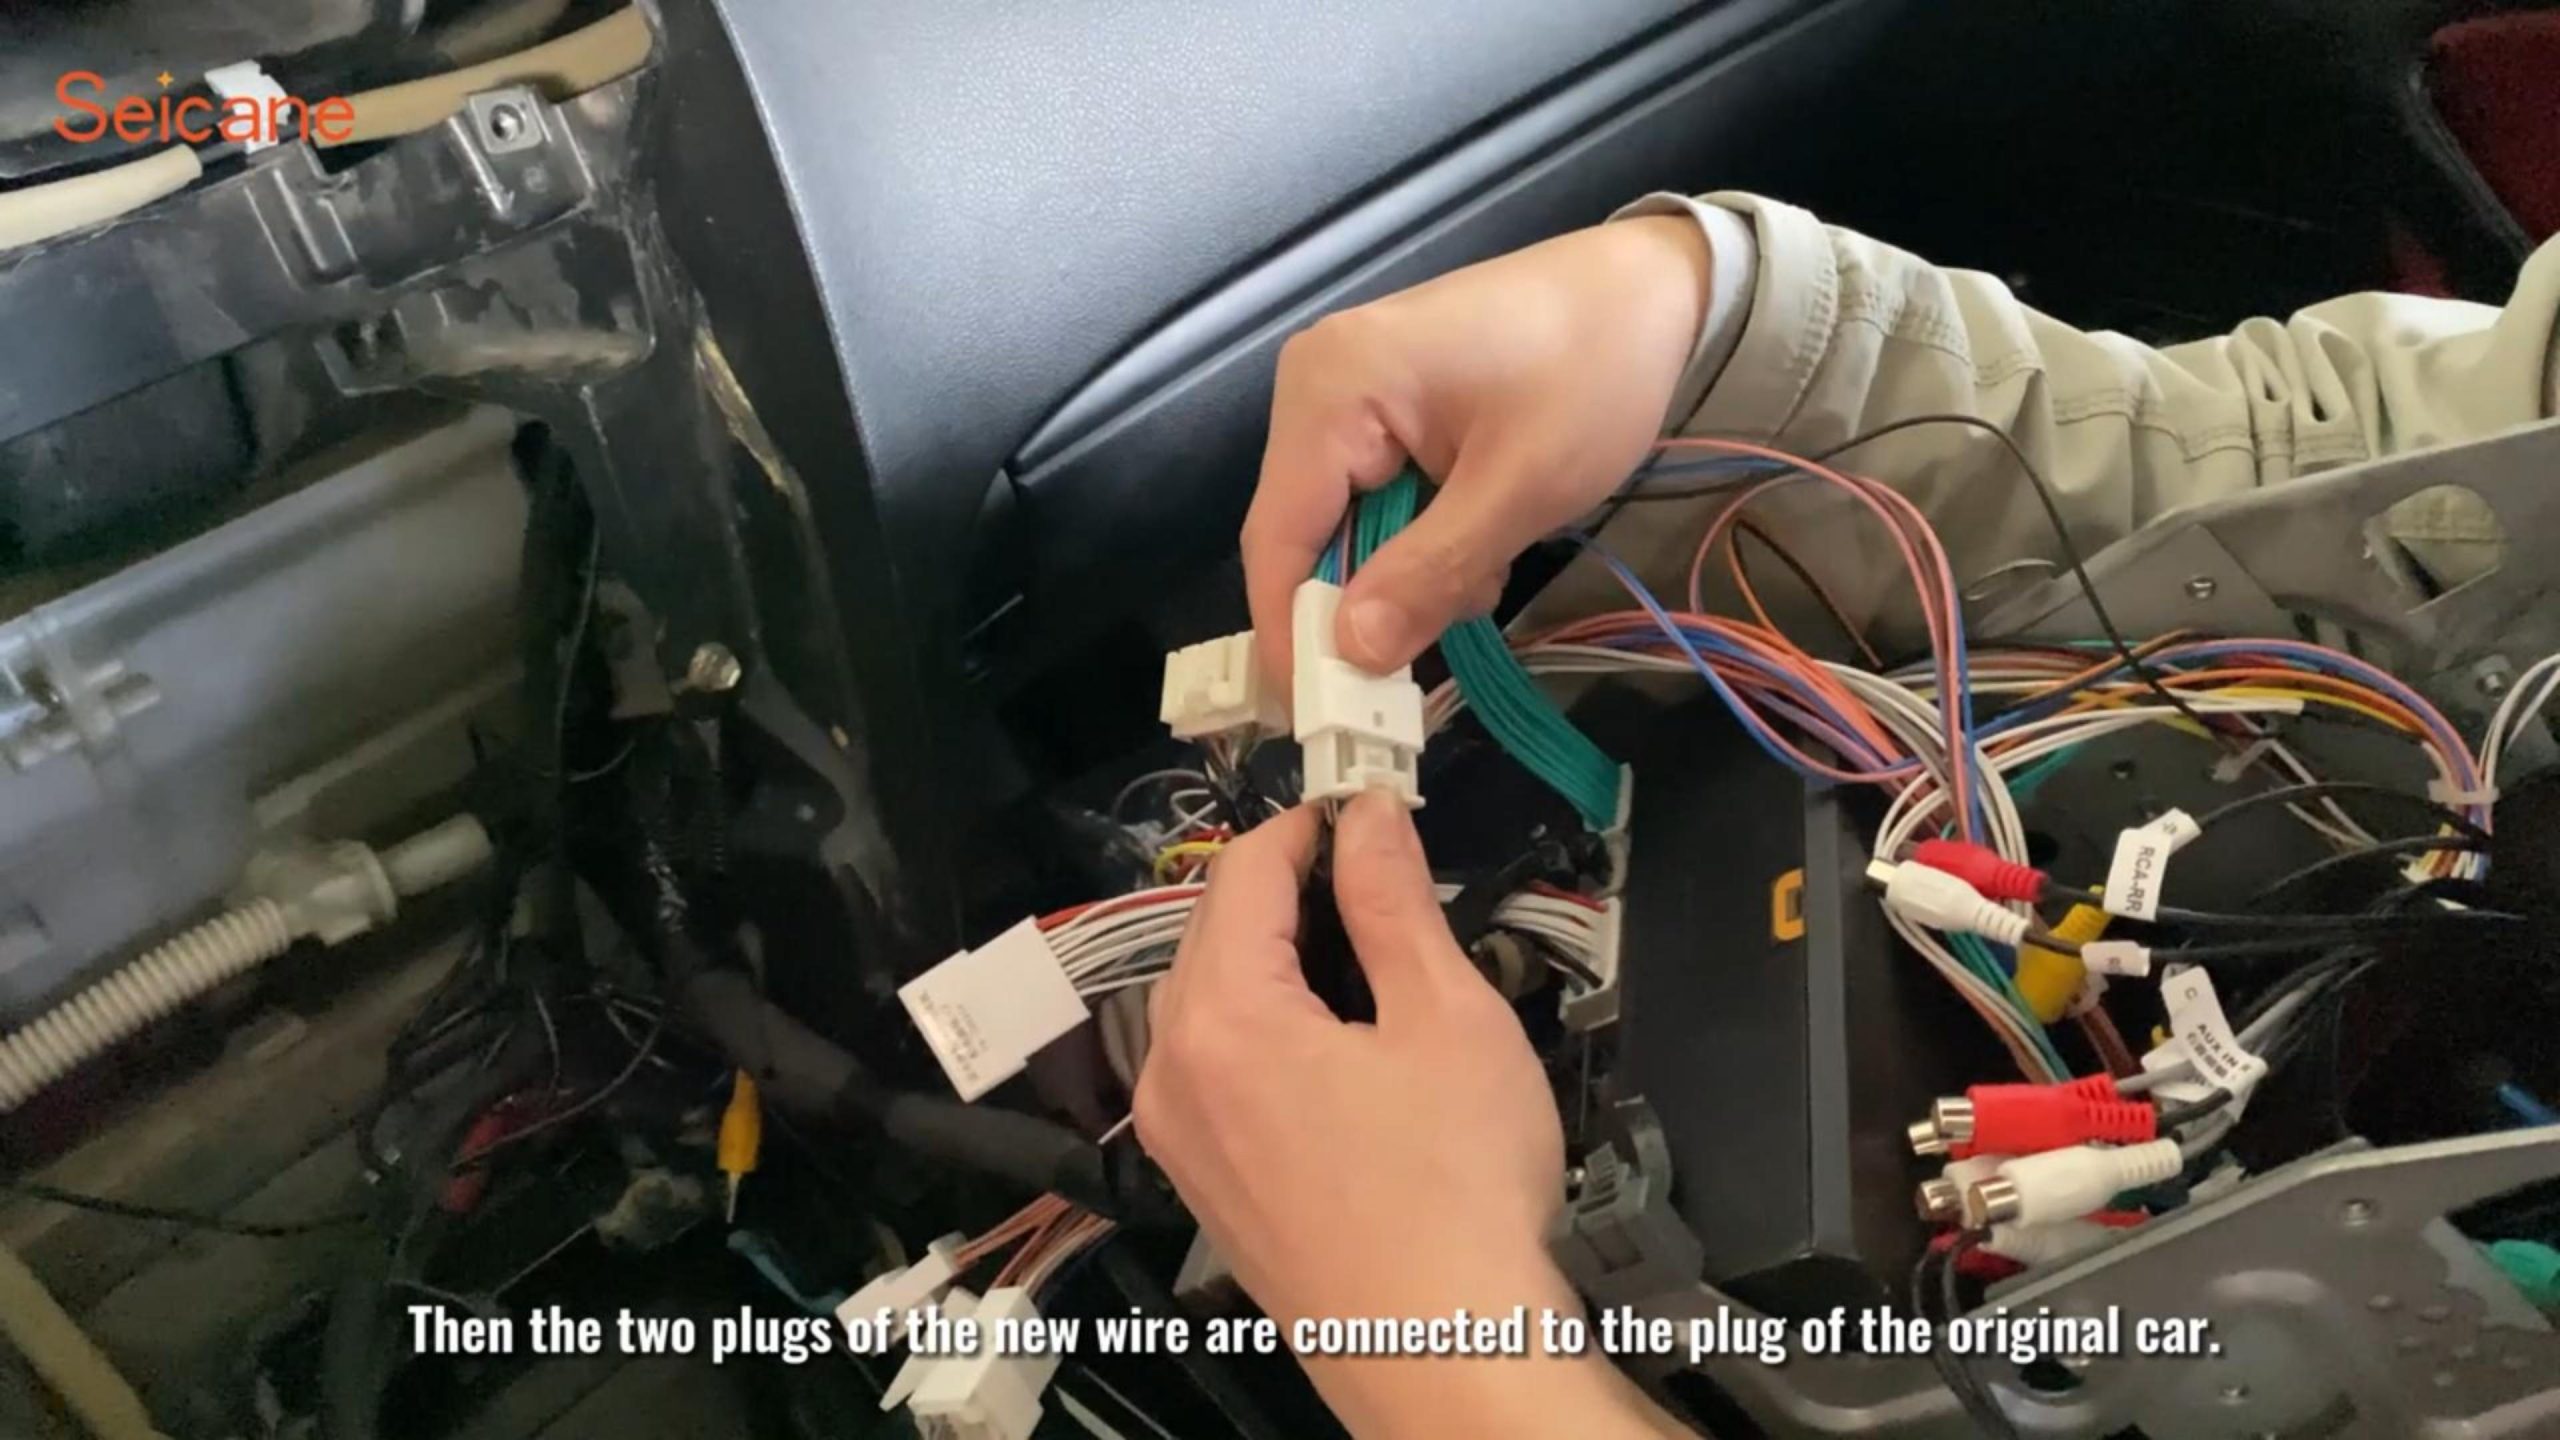
5.Reinsert Plugs: Connect the new wire to the original car plug according to size. Reinsert some plugs of the original CD host back. Connect the two plugs of the new wire to the plug of the original car.
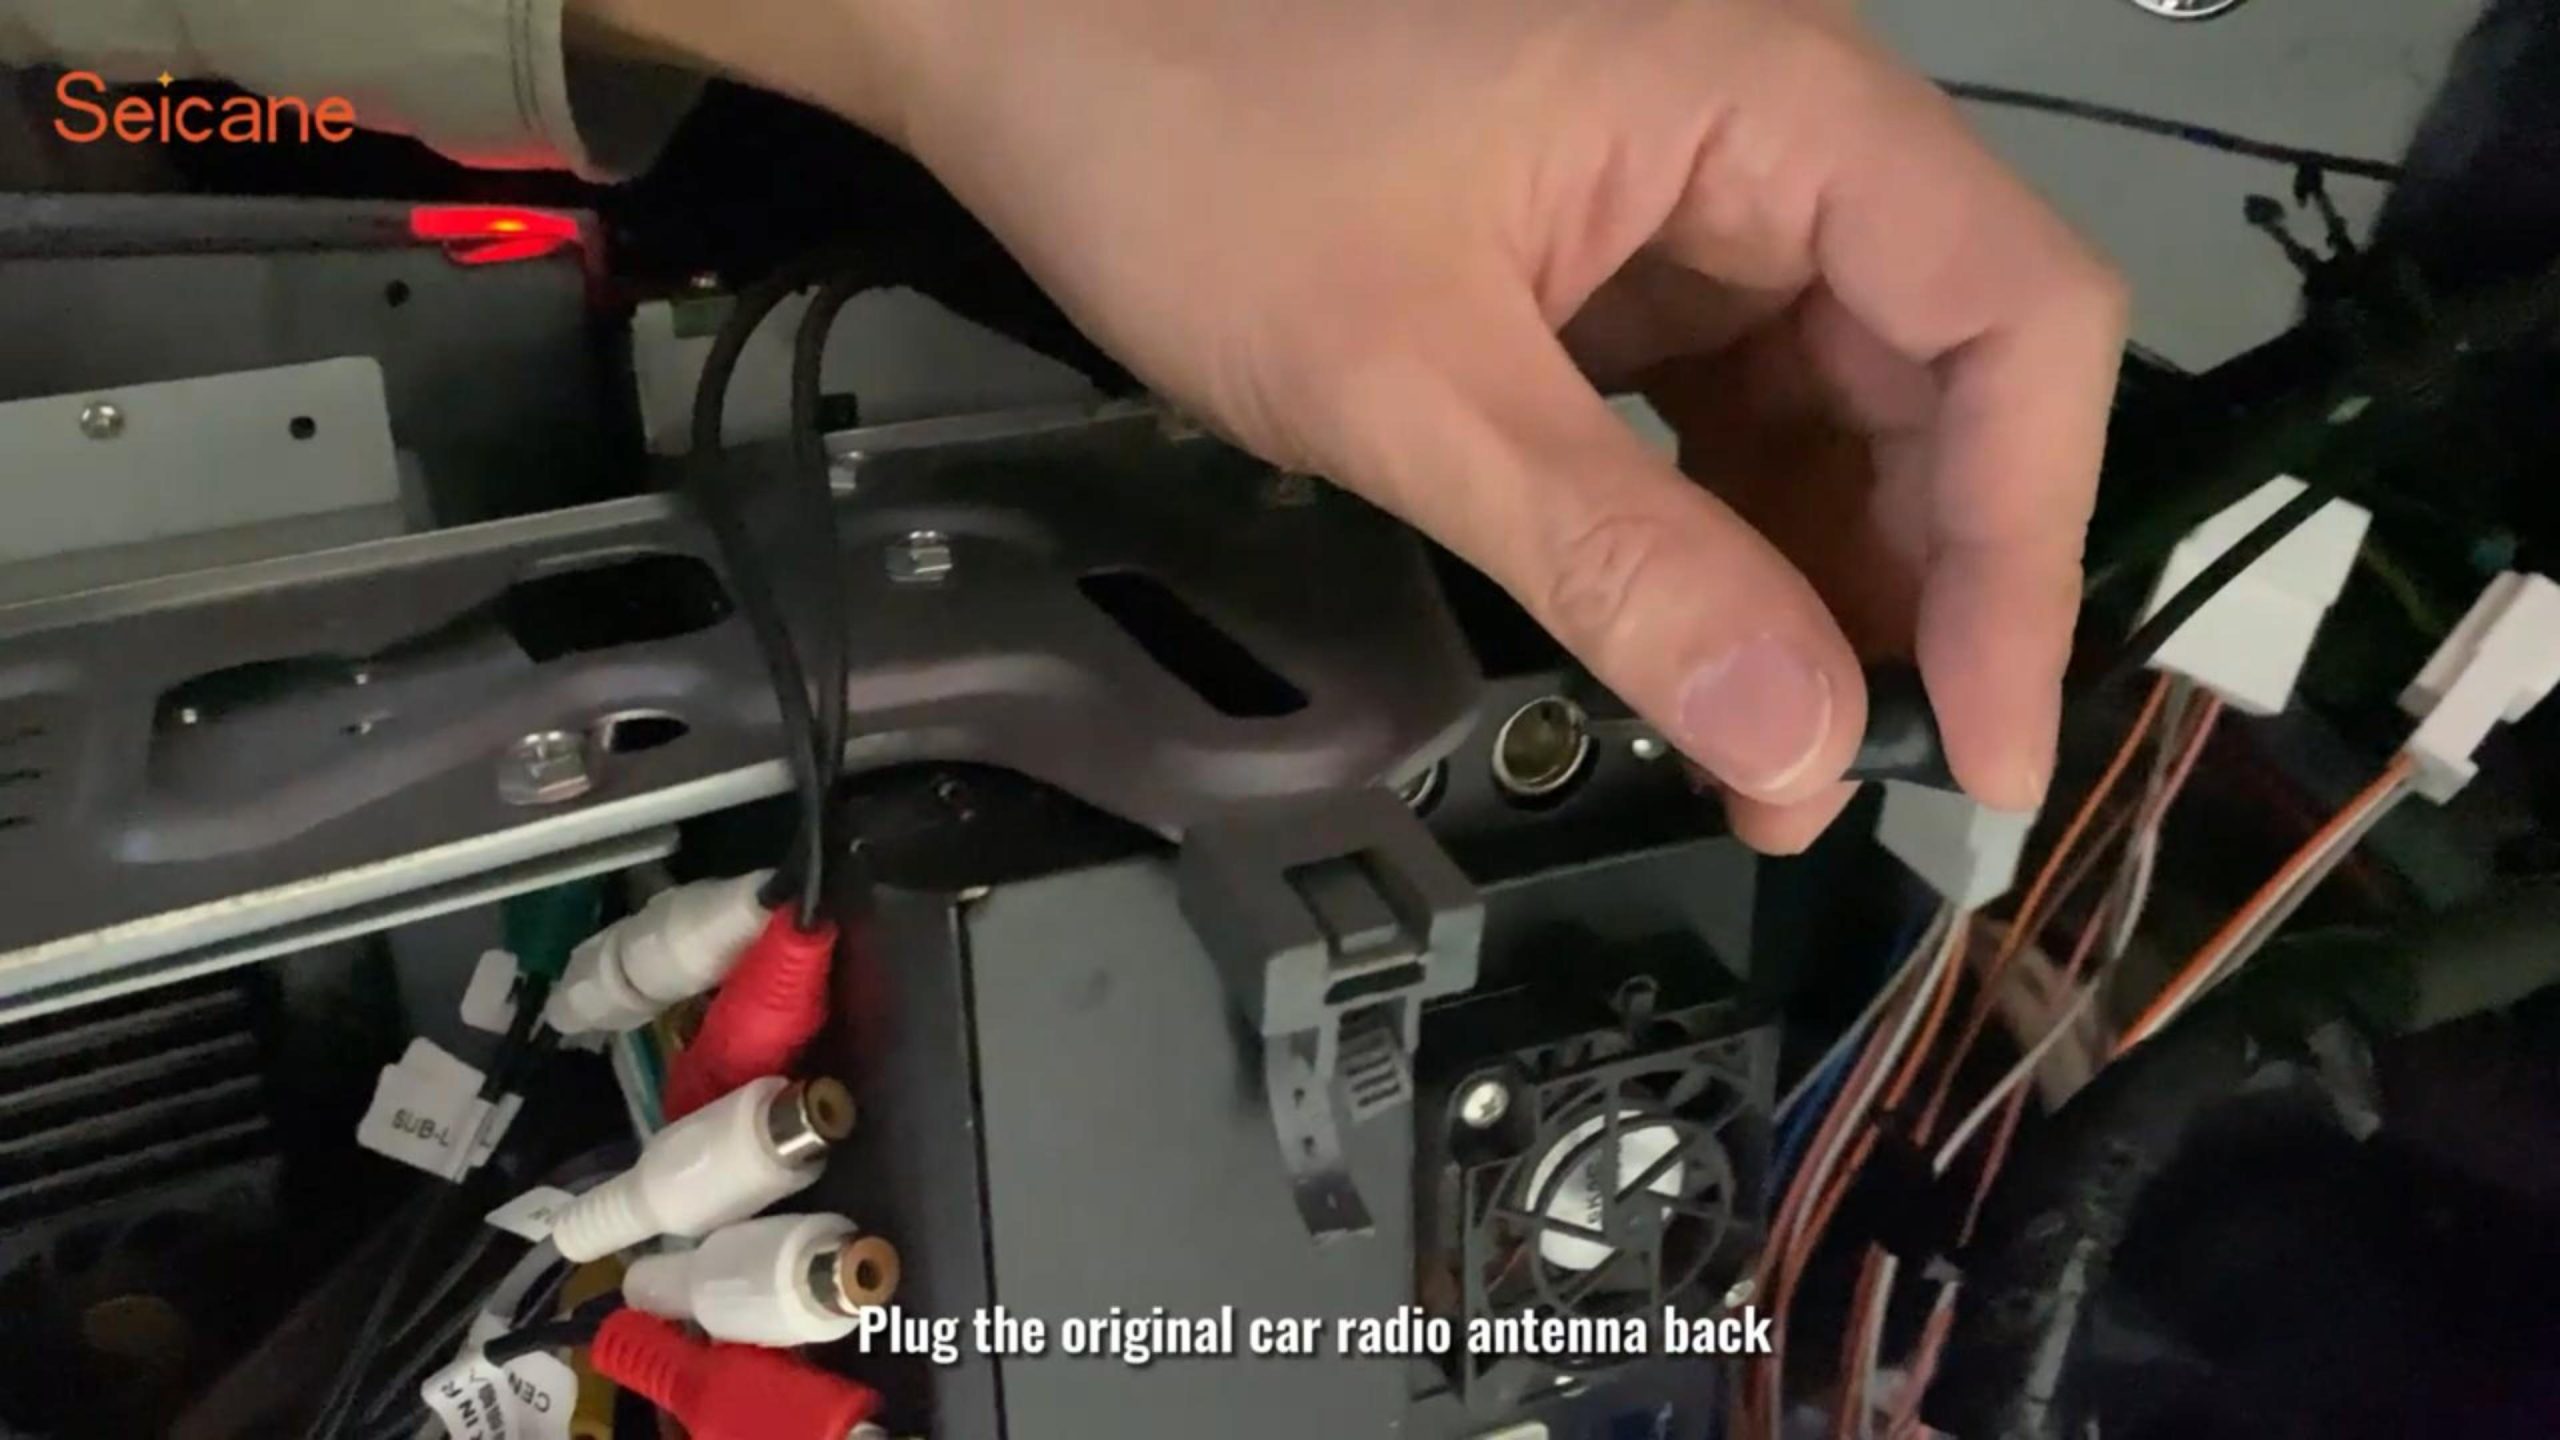
6.Reconnect the Radio Antenna: Reconnect the original car radio antenna. After all connections are made, install the new screen and secure it. Reinstall the air outlet, cigarette lighter panel, gear panel, and the two decorative strips. Finally, reinstall the gear grip.
Before use, you need to configure the CAN bus settings:
1.Enter the settings menu.
2.Select factory settings and input the password.
3.Enter CAN bus settings, select protocol options, and choose the vehicle model.
4.Click to confirm. Note that the first setting needs to be connected to the network.
After completing the upgrade, you’ll enjoy a modernized car system with improved functionality. Thank you for following along with our guide. We hope you find this information helpful and enjoy your newly upgraded Lexus IS.
Thanks for your reading this blog post. We hope this guide helps you successfully upgrade your Lexus IS car system. If you have any questions, please leave a comment below.
Recent Comments